Category: Input-lag

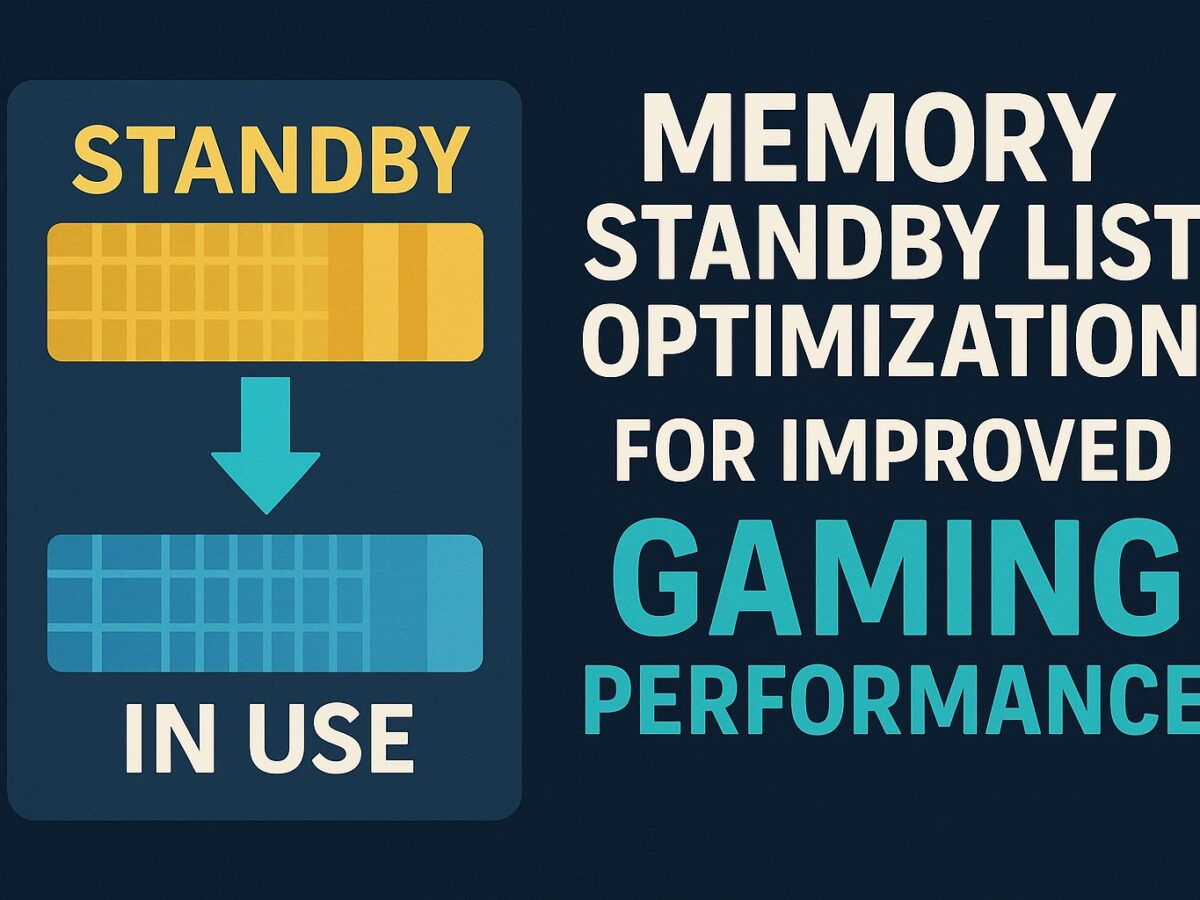
  • Memory standby list optimization for improved gaming performance

    As gaming technology evolves, the demand for optimized system performance continues to grow. One critical factor influencing gaming performance is memory management, particularly the optimization of the memory standby list.

    The memory standby list is a feature in Windows operating systems that caches data for quick access. While it can improve system responsiveness, excessive standby memory can lead to issues such as stuttering, lags, and reduced gaming performance.

    This guide explores the concept of the memory standby list, its impact on gaming, and strategies for optimizing it to enhance gaming performance.

    What is the memory standby list?

    The memory standby list in Windows refers to cached data stored in RAM that the operating system deems potentially useful for future operations. This includes application code, filesystem cache, and other unused physical memory. The standby list allows Windows to quickly access frequently used data without reloading it from storage, thereby improving overall system performance (WindoQ, 2025).

    However, the standby list can grow excessively large during prolonged gaming sessions, occupying significant portions of RAM. This can result in reduced usable memory for active processes, causing micro-stutters, performance drops, and even system instability (Tom’s Hardware Forum, 2022).

    The impact of the memory standby list on gaming

    1. Stuttering And performance Drops

    When gaming, the system requires a significant amount of free RAM to process textures, assets, and other game-related data. If the standby list occupies too much memory, the system may struggle to allocate resources efficiently, leading to stuttering and frame drops (Steam Community, 2025).

    2. Reduced Responsiveness

    Excessive standby memory can delay the system’s ability to allocate resources to new applications or processes. This is particularly problematic in high-performance gaming scenarios, where real-time responsiveness is crucial (WindoQ, 2025).

    3. Memory Leaks and Paging

    High standby memory usage can exacerbate memory leaks, forcing the system to rely on paging (using the hard drive or SSD as virtual memory). This significantly slows down performance, as storage access is much slower than RAM (Tom’s Hardware Forum, 2022).

    Strategies for optimizing the memory standby list

    1. Using Intelligent standby list cleaner (ISLC)

    The Intelligent Standby List Cleaner (ISLC) is a popular tool designed to monitor and clear the memory standby list based on user-defined thresholds. By default, ISLC purges the standby list when it exceeds 1GB or when free memory drops below 1024MB. These thresholds can be customized to suit specific gaming needs (Wagnardsoft, 2025).

    Benefits of islc:

    • Automatic Management: ISLC runs in the background, ensuring that the standby list remains within acceptable limits without manual intervention.
    • Improved Gaming Performance: By maintaining adequate free memory, ISLC reduces stuttering and enhances frame rates during gaming sessions.
    • Low Resource Usage: The tool is lightweight and has minimal impact on CPU and system resources (Wagnardsoft, 2025).

    2. Manual Clearing of the standby List

    For users who prefer not to use third-party tools, the standby list can be cleared manually using utilities like RAMMap. This method provides greater control but requires regular monitoring and intervention (AddictiveTips, 2025).

    Steps to clear the standby list manually:

    1. Download and run RAMMap (requires administrative privileges).
    2. Navigate to the “Empty” menu and select “Empty Standby List.”
    3. Monitor memory usage to ensure optimal performance.

    3. Adjusting Windows Settings

    Windows provides built-in tools and settings to optimize memory management. These include:

    • Disabling SysMain (SuperFetch): SysMain preloads frequently used applications into memory, which can inflate the standby list. Disabling this service can free up memory for gaming (WindoQ, 2025).
    • Reducing Startup Applications: Limiting the number of background applications reduces memory usage and prevents the standby list from growing excessively (WindoQ, 2025).

    4. Upgrading Hardware

    While software optimizations can improve performance, upgrading hardware remains the most effective solution for memory-related issues. Increasing the amount of physical RAM ensures that the system has sufficient resources to handle both the standby list and active processes (Tom’s Hardware Forum, 2022).

    Best practices for memory optimization in gaming

    1. Monitor Memory Usage Regularly
      Use Task Manager or Resource Monitor to track memory usage and identify potential issues with the standby list (WindoQ, 2025).
    2. Customize ISLC Settings
      Adjust ISLC thresholds based on your system’s specifications and gaming requirements. For example, users with 16GB of RAM may set the purge threshold to 2GB (Wagnardsoft, 2025).
    3. Optimize Windows Services
      Disable unnecessary services and startup applications to reduce memory usage and improve system responsiveness (WindoQ, 2025).
    4. Upgrade Hardware When Necessary
      If software optimizations fail to resolve performance issues, consider upgrading to at least 32GB of RAM for modern gaming (Tom’s Hardware Forum, 2022).

    Conclusion

    Optimizing the memory standby list is a crucial step in enhancing gaming performance, particularly for users experiencing stuttering, lags, or frame drops. Tools like Intelligent Standby List Cleaner provide automated solutions, while manual methods and Windows settings offer additional flexibility.

    However, the effectiveness of these strategies depends on the user’s system specifications and gaming requirements. For long-term performance improvements, upgrading hardware remains the most reliable solution.

    By implementing these strategies, gamers can achieve smoother gameplay and maximize the potential of their systems.

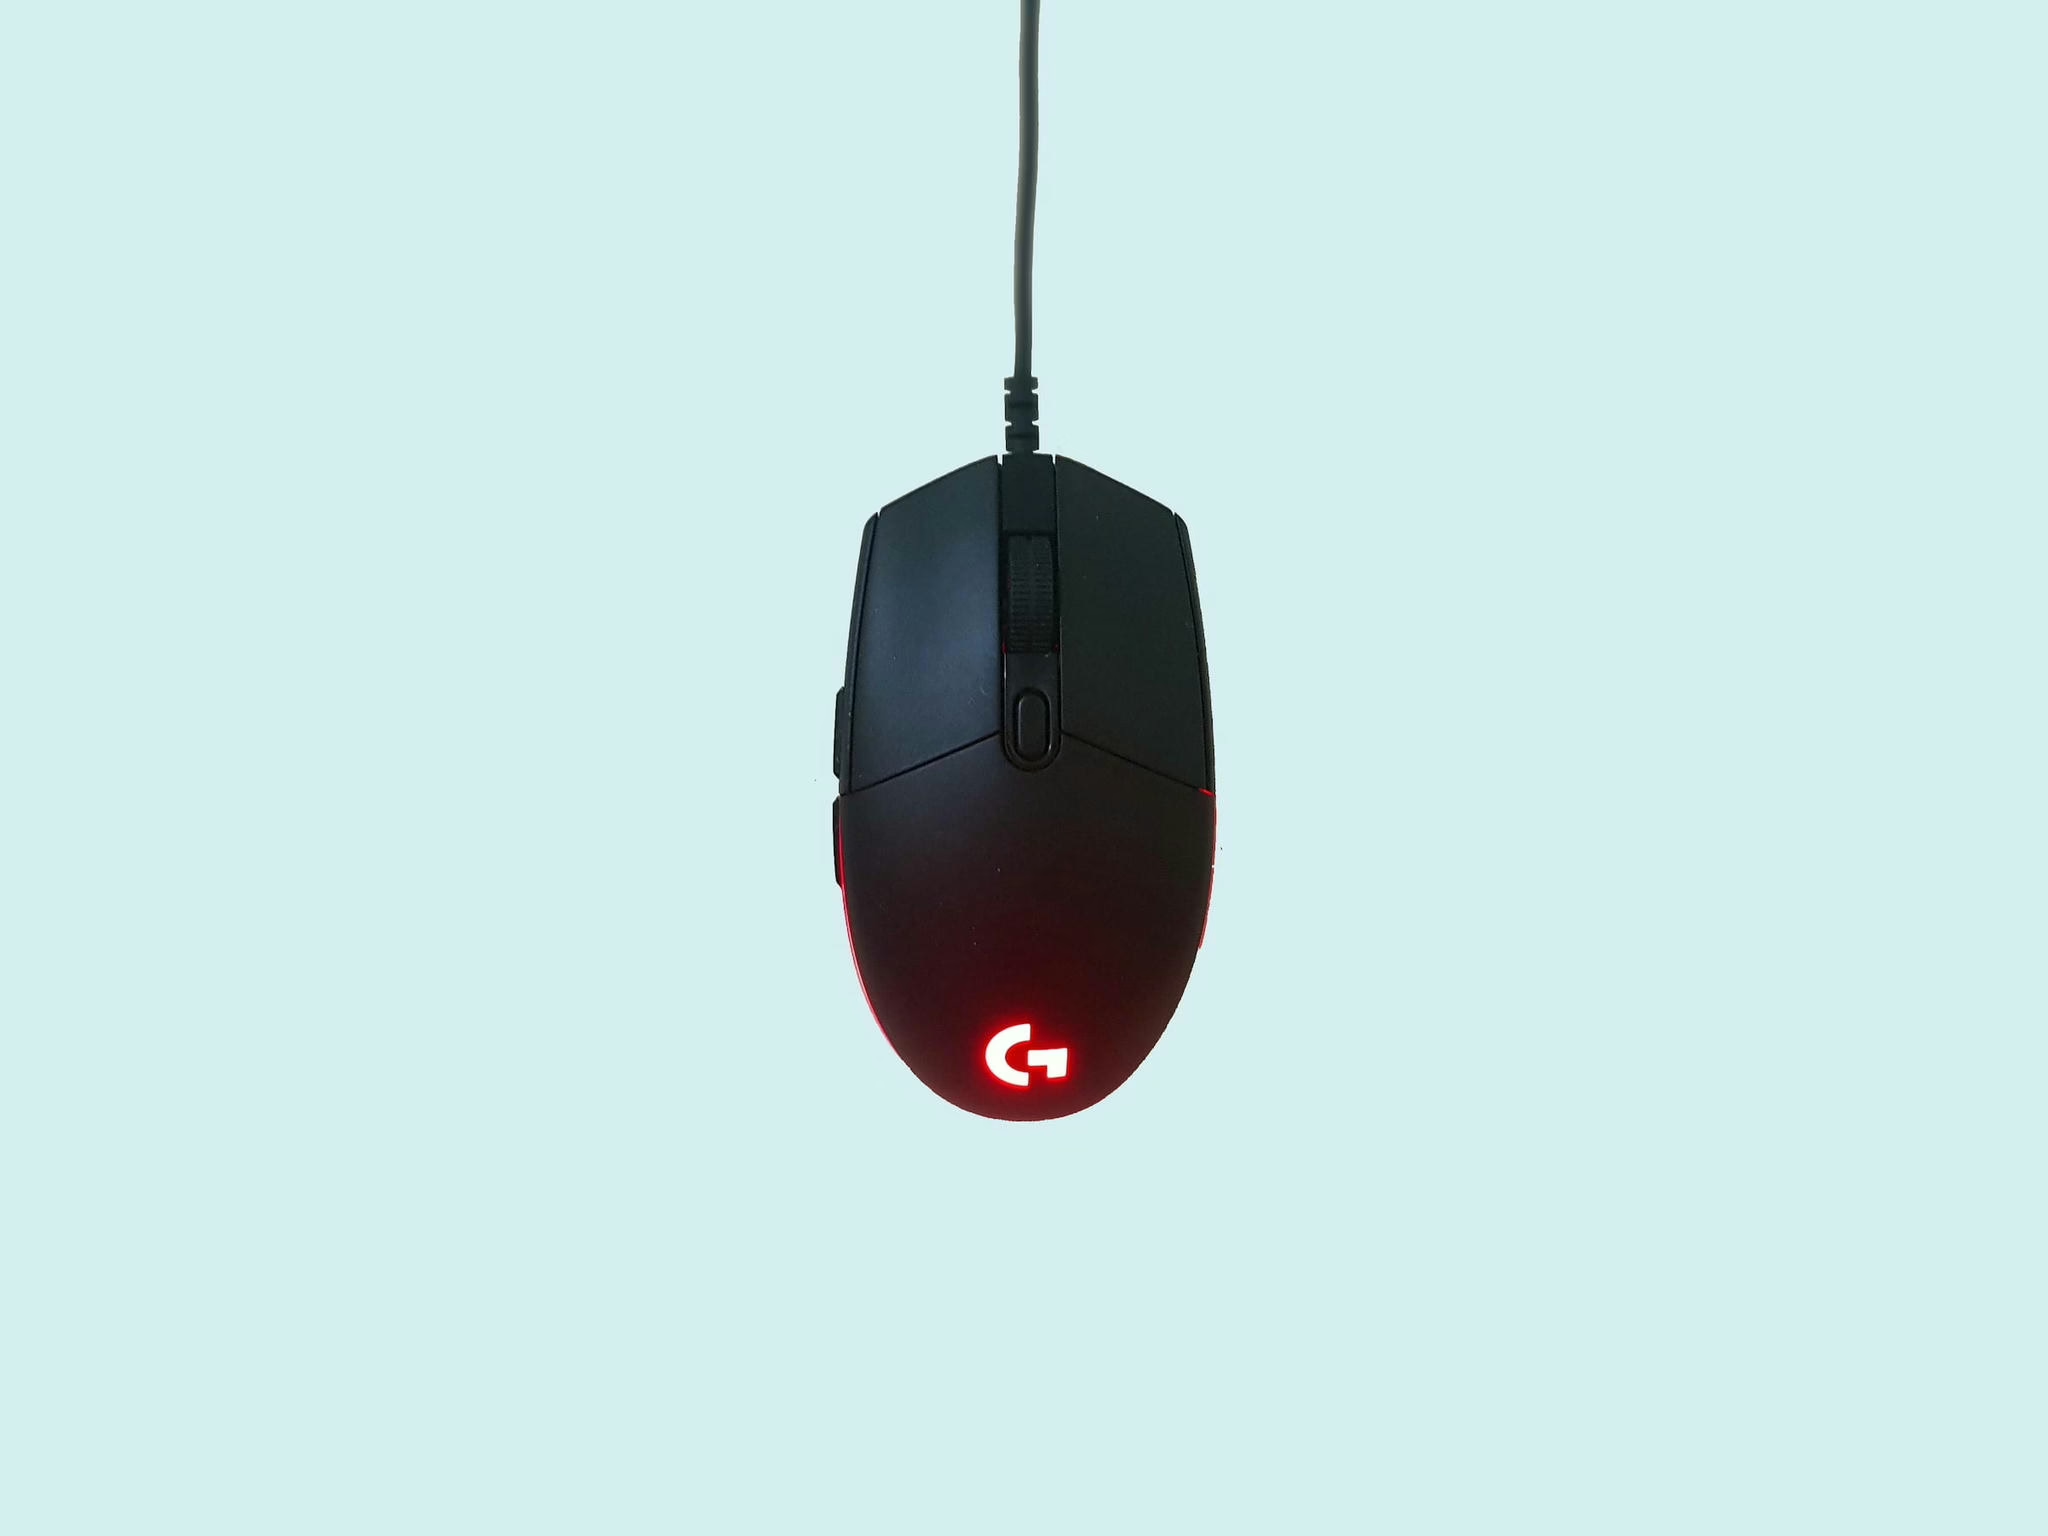
  • Logitech G502 Optimization and Troubleshooting Guide

    The Logitech G502 series has been a cornerstone of PC gaming peripherals, offering a range of mice that cater to the needs of gamers and professionals alike.

    The series includes the G502 Hero, the G502 LIGHTSPEED, and the latest iteration, the G502 X.

    Each version has brought incremental improvements, maintaining the series’ reputation for precision, customization, and durability.

    However, even the most reliable gaming mice can encounter issues such as stuttering or lagging.

    This guide aims to provide an in-depth analysis and troubleshooting guide for optimizing the performance of Logitech G502 gaming mice.

    Performance Issues and Fixes

    One common issue with the Logitech G502 Hero is stuttering or lagging, which can significantly hinder the user experience.

    According to a source from GetDroidTips, this problem may arise from an unstable connection, potentially due to a faulty USB transceiver (GetDroidTips).

    To address this, users should check the mouse’s connection by ensuring the USB ports on their system are functioning correctly.

    Fix 1: Check the Mouse Connection

    An unstable connection is often the culprit behind stuttering or lagging issues.

    Users should inspect their USB ports for any signs of damage or debris that could interfere with the connection.

    It is also advisable to test the mouse on different ports or even on another computer to rule out port-related issues.

    Fix 2: Update or Reinstall Mouse Drivers

    Another solution is to update or reinstall the mouse drivers. Outdated drivers can cause compatibility issues that may result in erratic mouse behavior.

    Users should visit the Logitech website to find the latest drivers for their specific mouse model and install them accordingly.

    In some cases, a complete reinstallation of the drivers may be necessary to resolve persistent issues.

    Fix 3: Adjust Pointer Settings

    Customizing pointer settings is crucial for achieving optimal performance.

    The G502 series supports customization in two modes: Automatic Game Detection mode and On-Board Memory mode (Logitech Support).

    Users should utilize the Logitech G HUB to fine-tune their DPI levels, polling rate, and other pointer settings to match their specific needs and preferences.

    Logitech G502 Series Reviews and Performance

    The Logitech G502 Hero has been praised for its premium feel and wired reliability, while the G502 LIGHTSPEED offers a wireless option with low click latency and multiple connectivity options, including Bluetooth support (RTINGS).

    The G502 X, as the latest version, boasts upgraded switches for improved performance.

    These reviews underscore the importance of maintaining the mouse’s firmware and software to ensure users can leverage these advanced features.

    Logitech G502 LIGHTSPEED Setup

    For the G502 LIGHTSPEED model, proper setup is essential for optimal wireless performance.

    Logitech provides clear setup instructions that include turning the mouse on, downloading the Logitech G HUB software, and ensuring a clear wireless range of up to 10 meters (Logitech Support).

    Users should follow these instructions meticulously to prevent wireless interference and connectivity issues.

    Conclusion

    The Logitech G502 series remains a top choice for gaming enthusiasts and professionals seeking a high-performance mouse.

    While issues like stuttering or lagging can occur, they can often be resolved through simple troubleshooting steps such as checking connections, updating drivers, and customizing pointer settings.

    Reviews of the G502 series highlight the importance of these measures, as well as proper setup, to take full advantage of the mouse’s capabilities.

    By following the guidelines provided, users can ensure their Logitech G502 mouse performs at its best, providing a seamless and responsive experience.

  • Wooting 60 HE Optimization and Troubleshooting Guide

    The Wooting 60 HE keyboard has garnered attention in the gaming community for its compact design, customization capabilities, and innovative analog input technology.

    This report delves into optimizing and troubleshooting the Wooting 60 HE, drawing on various sources to provide a comprehensive guide for users seeking to enhance their experience or resolve issues with this device.

    Optimization Strategies for the Wooting 60 HE

    Optimizing the 60 HE involves leveraging its software features and advanced settings to tailor the keyboard to individual preferences and needs.

    The HE offers a range of customization options, particularly through its companion software known as Wootility.

    This software allows users to fine-tune functions, including the rapid trigger functionality that sets the Wooting 60 HE apart in the gaming keyboard market (Xbitlabs).

    Wooting 60 HE Gaming

    To optimize the Wooting 60 HE for gaming, users should focus on adjusting the actuation point of the keys, which can be done through the Wootility.

    This feature enables gamers to set the point at which keypresses are registered, allowing for faster response times and more precise control.

    Moreover, the Wooting 60 HE’s analog input capability can be harnessed to provide nuanced control in games, such as variable movement speed depending on how far a key is pressed.

    Lighting customization is another aspect of optimization. Although the Wooting 60 HE scored a 6.0 in lighting customization according to TechGearLab, users can still personalize the RGB lighting to their liking, creating profiles for different games or environments (TechGearLab).

    Troubleshooting Common Issues

    Despite its advanced features, users may encounter issues with the Wooting 60 HE. Common problems include firmware update errors and hardware compatibility.

    For instance, early batch 60HE ARM users on Windows might need to apply a registry fix provided by Wooting to address update or restore errors (Wooting Help Scout).

    If a user needs to restore their keyboard to factory settings, the Wooting support outlines a specific key combination to enter keyboard restore mode, which varies depending on the keyboard layout.

    For the 60% layout of the Wooting 60 HE, the combination is the [Backspace] and [Fn] keys (Wooting Help Scout).

    User-Friendliness and Convenience

    The ease of programming and macros, along with the convenience of the keyboard, contribute to the user experience.

    The Wooting 60 HE scored a 7.0 and 6.4 respectively in these categories, highlighting that while the keyboard has strong points in performance, there is room for improvement in user-friendliness (TechGearLab).

    Users can enhance convenience by setting up dedicated arrow keys using the mod tap feature, as detailed in the Wooting 60 HE Quickstart guide (Wooting).

    Conclusion

    In conclusion, the Wooting 60 HE is a powerful tool for gamers, offering unparalleled customization and performance.

    However, to fully harness its capabilities, users must engage with its software features and be proactive in troubleshooting.

    While the keyboard does have some areas that could be improved for ease of use, its strengths in performance and customization are evident.

    The Wooting 60 HE stands as a testament to the potential of gaming keyboards to enhance gameplay through technological innovation.

  • Black Frame Insertion: A Critical Technique to Minimize Blur in Gaming Monitors

    Motion blur has been a persistent challenge in modern display technologies, particularly with the transition from CRT (Cathode Ray Tube) monitors to LCD and OLED displays. Black Frame Insertion (BFI) is a technology designed to mitigate motion blur by inserting black frames between the actual content frames, creating a smoother and crisper visual experience. This report delves into the evolution, mechanism, benefits, limitations, and practical applications of BFI in modern displays, with a focus on its relevance in gaming and entertainment.

    The evolution of black frame insertion

    Black Frame Insertion has its roots in the need to replicate the motion clarity of CRT monitors. CRTs naturally avoided motion blur due to their ability to refresh images with a blanking period between frames. However, with the advent of LCD and OLED technologies, the “sample-and-hold” nature of these displays introduced motion blur, as each frame remained static until the next refresh.

    The concept of BFI was first proposed by BenQ in 2006 as a solution for reducing blur on computer monitors. The initial idea was to insert a black frame between every frame of content displayed on an LCD screen. While this approach did not gain significant traction initially, it laid the groundwork for modern implementations of BFI (RTINGS.com, 2024).

    How black frame insertion works

    BFI operates by inserting completely black frames between the actual content frames. This process effectively “resets” the viewer’s perception of motion, reducing the persistence of vision that causes motion blur. The human visual system interprets the black frames as a natural interruption, resulting in smoother motion and improved clarity (How-To Geek, 2024).

    For instance, in a display running at 60 frames per second (FPS), BFI can make the motion appear smoother by mimicking the refresh behavior of CRTs. This is particularly beneficial in fast-paced scenarios, such as gaming or action-packed movies, where motion blur can hinder the viewing experience (Itigic, 2020).

    Mechanism in oled displays

    OLED displays, known for their superior contrast ratios and color accuracy, have traditionally struggled with motion blur due to their sample-and-hold nature. The integration of BFI in OLED monitors has been a significant development. By blanking out the screen between frames, OLED displays can now offer a clearer and more responsive visual experience, similar to that of their LCD counterparts but with the added benefits of OLED technology.

    Benefits of black frame insertion

    1. Reduction of motion blur

    The primary advantage of BFI is its ability to reduce motion blur, particularly in fast-moving scenes. By resetting the viewer’s vision between frames, BFI creates a crisper and more natural image, enhancing the overall viewing experience (How-To Geek, 2024).

    2. Improved gaming experience

    In gaming, where responsiveness and clarity are crucial, BFI can significantly enhance the experience. Many gaming monitors and TVs now include BFI as a feature, marketed under various names such as “OLED Motion Pro” on LG OLED TVs (Josh Nichols Blog, 2024).

    3. Crt-like motion clarity

    BFI emulates the natural blanking period of CRTs, which were renowned for their motion clarity. This makes BFI particularly appealing to users who value the visual quality of CRT displays (RTINGS.com, 2024).

    4. Compatibility with various frame rates

    Unlike motion interpolation, which alters the frame rate of the original content, BFI works with the existing frame rate, preserving the integrity of the source material. This avoids the “soap opera effect” often associated with motion interpolation (How-To Geek, 2024).

    Limitations of black frame insertion

    1. Reduced brightness

    One of the most significant drawbacks of BFI is the reduction in brightness. Since black frames are inserted between content frames, the overall luminance of the display decreases. This can be particularly noticeable in OLED displays, where brightness is already a limiting factor.

    2. Flicker and viewer sensitivity

    BFI can introduce flicker, which may be noticeable to some viewers. This flicker can cause discomfort or eye strain, particularly during extended viewing sessions. The level of flicker tolerance varies among individuals (RTINGS.com, 2024).

    3. Input lag

    In gaming, input lag is a critical factor. While BFI can improve motion clarity, it may also introduce additional input lag, which can be detrimental to competitive gaming. Manufacturers are continually working to minimize this trade-off (Josh Nichols Blog, 2024).

    4. Implementation challenges

    Not all displays implement BFI effectively. Some manufacturers’ solutions may lack adjustability or introduce other issues, such as rapid flickering or pulsing. External solutions, such as retro-friendly BFI features on scalers like the Tink-4K, have been proposed to address these shortcomings (Shmups Forum, 2023).

    Practical applications

    1. Gaming monitors

    BFI is widely used in gaming monitors to enhance motion clarity and reduce blur. Brands like Asus and LG have integrated BFI into their high-end gaming displays, offering features like “OLED Motion Pro” to cater to gamers’ needs.

    2. Televisions

    Many modern TVs include BFI as a feature to improve motion clarity in movies and sports. However, the effectiveness of BFI varies depending on the implementation and the viewer’s sensitivity to flicker (How-To Geek, 2024).

    3. Professional applications

    In professional settings, such as video editing or medical imaging, where motion clarity is critical, BFI can be a valuable tool. Its ability to reduce blur without altering the frame rate makes it suitable for applications requiring high visual fidelity (RTINGS.com, 2024).

    Conclusion

    Black Frame Insertion is a critical technology for reducing motion blur in modern displays. By inserting black frames between content frames, BFI enhances motion clarity and creates a smoother visual experience. While it has limitations, such as reduced brightness and potential flicker, its benefits in gaming, entertainment, and professional applications make it a valuable feature.

    As display technologies continue to evolve, manufacturers are likely to refine BFI implementations to address its drawbacks and improve its effectiveness. For users seeking CRT-like motion clarity in LCD and OLED displays, BFI remains one of the most promising solutions.

  • Gaming mouse sensor smoothing: a comprehensive analysis

    In the competitive realm of gaming, precision and accuracy are critical factors that can significantly influence a player’s performance. Among the many features of gaming mice, sensor smoothing has been a topic of extensive debate. While it is designed to enhance cursor movement by creating smoother transitions, its utility in gaming has been questioned due to its potential impact on performance.

    This guide delves into the concept of mouse sensor smoothing, its implementation, its effects on gaming performance, and the broader industry perspective on the technology.

    Understanding mouse sensor smoothing

    Mouse sensor smoothing is a technology implemented in gaming mice to create smoother cursor movements on the screen. This is achieved through hardware or software mechanisms within the mouse. The mouse’s firmware or optical sensor averages multiple data points to predict the next position of the cursor using a pre-set algorithm. The primary intention of this feature is to eliminate jitter and provide a more fluid motion, which can enhance the user experience in non-gaming scenarios.

    Historically, mouse smoothing was introduced to address the limitations of older mouse sensors. These sensors lacked the precision of modern optical sensors and often produced abrupt cursor movements due to their low DPI (dots per inch) capabilities. Manufacturers implemented smoothing to predict the user’s intended movement and create a visually appealing, uninterrupted cursor motion (ProSettings.net, 2022).

    The impact of sensor smoothing on gaming

    Advantages of sensor smoothing

    1. Enhanced Visual Smoothness: For casual users or those using older hardware, smoothing can reduce jitter and create a more visually appealing cursor movement. This can be beneficial in non-gaming scenarios, such as office work or general computer use (ProSettings.net, 2022).
    2. Improved User Experience in Low-Precision Tasks: In environments where pixel-perfect precision is not required, smoothing can make the mouse feel more responsive and fluid.

    Disadvantages of sensor smoothing in gaming

    For competitive gaming, where precision and immediate responsiveness are paramount, sensor smoothing can introduce several disadvantages:

    1. Latency Issues: Smoothing adds a layer of processing to the raw input, which can result in input lag. This delay, even if minimal, can disrupt the player’s ability to respond quickly in fast-paced gaming scenarios.
    2. Loss of Precision: By predicting cursor movements, smoothing can cause the cursor to deviate slightly from the player’s actual input. This “floaty” feeling can lead to missed shots or inaccurate movements, particularly in first-person shooter (FPS) games (ProSettings.net, 2022).
    3. Unnatural Cursor Behavior: Human hand movements are rarely perfectly straight or predictable. Smoothing algorithms may “correct” these movements, causing the cursor to skip past small but critical targets, such as an enemy’s head in a shooter game (ProSettings.net, 2022).
    4. Counterproductive for High-Performance Gaming: Within the gaming community and among hardware manufacturers, the consensus is that minimizing or eliminating smoothing is essential for optimal gaming performance. Gamers are advised to prioritize mice with sensors that offer raw, unaltered input across all DPI levels.

    Industry perspective on sensor smoothing

    The shift toward zero smoothing

    Modern gaming mice are designed with advanced optical sensors that offer high DPI counts and raw input capabilities. These sensors eliminate the need for smoothing, as they can accurately track even the smallest movements without introducing jitter. As a result, many manufacturers now market their mice as having “zero smoothing” to appeal to competitive gamers.

    Innovations in gaming mouse technology

    In addition to eliminating smoothing, manufacturers are incorporating other features to enhance gaming performance. These include:

    • Adjustable DPI Settings: Allowing users to customize sensitivity for different gaming scenarios.
    • Onboard Memory: Enabling the storage of multiple profiles for quick transitions between game setups.
    • Mechanical Switches: Providing tactile, responsive clicks rated for millions of actuations (Alibaba.com Reads, 2024).

    Alternatives to sensor smoothing

    For gamers who experience jitter or erratic cursor movements, there are alternative solutions to sensor smoothing:

    1. Sensor Calibration: Proper calibration ensures accurate tracking and eliminates the need for smoothing. This typically involves placing the mouse on a flat, non-reflective surface and using the manufacturer’s calibration utility (ClickingSpeedTester, 2024).
    2. High-Quality Mouse Pads: Using a mouse pad designed for gaming can improve sensor performance and reduce jitter (ClickingSpeedTester, 2024).
    3. Upgrading to Modern Sensors: Investing in a gaming mouse with a high-quality optical sensor can provide raw input without the drawbacks of smoothing (Forgeary, 2024).

    Community feedback on sensor smoothing

    The gaming community has expressed strong opinions against sensor smoothing. On forums like Reddit, gamers frequently discuss the negative impact of smoothing on gameplay. For instance, one user described the experience as “wrestling with a block of ice,” highlighting the unnatural and frustrating feel of smoothed cursor movements (Reddit, 2024).

    Conclusion

    Mouse sensor smoothing, while beneficial in certain contexts, is largely counterproductive for competitive gaming. The technology introduces latency and reduces precision, which are critical drawbacks in high-performance scenarios. Modern gaming mice have largely moved away from smoothing, offering raw input and advanced features to meet the demands of professional and competitive gamers.

    Gamers seeking optimal performance should prioritize mice with high-quality sensors that provide unaltered input. Additionally, proper sensor calibration and the use of gaming-specific accessories can further enhance accuracy and responsiveness.

  • Nvidia Low Latency Mode: The Ultimate Guide

    Nvidia Low Latency Mode is a feature that reduces the delay between your actions in a game and their display on the screen.

    This feature is especially important in fast-paced games, where a few milliseconds of delay can mean the difference between winning and losing.

    Importance of Low Latency in Gaming

    Low latency is crucial in gaming because it ensures that your inputs are registered and displayed on the screen as quickly as possible.

    A high latency can result in lag, stuttering, and other issues that can affect your gameplay experience. Nvidia Low Latency Mode helps to minimize these issues and improve your overall gaming experience.

    Understanding Latency

    Before we dive into Nvidia Low Latency Mode, let’s first understand what latency is and how it affects gaming.

    Definition of Latency

    Latency is the time delay between when an action is initiated and when it is displayed on the screen. In gaming, latency refers to the delay between when you press a button or move your mouse and when the action is displayed on the screen.

    Types of Latency

    There are several types of latency that can affect gaming, including input latency, display latency, and network latency. Input latency refers to the delay between when you press a button or move your mouse and when the action is registered by your computer.

    Display latency refers to the delay between when an image is generated and when it is displayed on the screen.

    Network latency refers to the delay between when data is sent over the internet and when it is received by your computer.

    Causes of Latency

    There are several factors that can contribute to latency, including your computer’s hardware, the software you are using, and your internet connection.

    Upgrading your computer’s hardware, using optimized software, and improving your internet connection can all help to reduce latency.

    What is Nvidia Low Latency Mode

    Now that we understand what latency is and how it affects gaming, let’s explore what Nvidia Low Latency Mode is and how it works.

    How it Works

    Nvidia Low Latency Mode works by reducing the number of frames your computer renders ahead of time. This reduces the delay between your actions and their display on the screen, resulting in a smoother and more responsive gaming experience.

    Advantages of Nvidia Low Latency Mode has several advantages for gamers. First, it reduces input lag, ensuring that your actions are registered and displayed on the screen as quickly as possible. This can be especially important in fast-paced games, where split-second decisions can make all the difference.

    Second, Low Latency Mode can reduce stuttering and screen tearing, resulting in a smoother and more visually appealing gaming experience.

    This is because the reduced number of frames being rendered ahead of time helps to ensure that the frames being displayed on the screen are in sync with the refresh rate of your monitor.

    Overall, Nvidia Low Latency Mode helps to minimize the delay between your actions and their display on the screen, resulting in a more responsive and immersive gaming experience.

    How to Enable Nvidia Low Latency Mode

    Now that we understand what Nvidia Low Latency Mode is and its benefits, let’s explore how to enable it on your system.

    Steps to Enable Low Latency Mode

    To enable Nvidia Low Latency Mode, follow these steps:

    Total Time: 5 minutes

    Open the Nvidia Control Panel

    Click on “Manage 3D Settings”

    Click on the “Program Settings” tab

    Select the game you want to enable Low Latency Mode for

    Scroll down to “Low Latency Mode” and select “Ultra” or “On”

    Click “Apply” to save the changes

    System Requirements for Low Latency Mode

    To use Nvidia Low Latency Mode, you will need a compatible Nvidia graphics card and driver.

    The feature is supported on all Nvidia Turing GPUs and later, including the GeForce RTX 20 and 30 series, as well as Quadro and Titan GPUs.

    How to Test Nvidia Low Latency Mode

    Now that you’ve enabled Nvidia Low Latency Mode on your system, you may be wondering how to test it and measure the difference it makes.

    Fortunately, Nvidia provides a tool called the “Nvidia Latency Tester” that allows you to measure the latency of your system before and after enabling Low Latency Mode.

    Testing the Mode

    To test Nvidia Low Latency Mode using the Nvidia Latency Tester, follow these steps:

    1. Download and install the Nvidia Latency Tester
    2. Launch the program and click “Start Test”
    3. Play your game as you normally would for a few minutes
    4. Click “Stop Test” to end the measurement
    5. Note the “Input Lag” value
    6. Enable Nvidia Low Latency Mode and repeat the test
    7. Note the new “Input Lag” value
    8. How to Measure the Difference

    To measure the difference that Nvidia Low Latency Mode makes, simply compare the “Input Lag” values before and after enabling the feature. The lower the value, the less input lag there is, and the more responsive your system will be.

    Conclusion

    Nvidia Low Latency Mode is a powerful feature that can help to minimize latency and improve your gaming experience.

    By reducing input lag and stuttering, Low Latency Mode can help you stay competitive in fast-paced games and enjoy a smoother and more immersive gaming experience overall.

    By following the steps outlined in this article, you can enable and test Nvidia Low Latency Mode on your system and experience the benefits for yourself.

  • In-Depth Analysis of Analog Switches For Gaming Keyboard

    The gaming peripherals market has seen significant advancements in recent years, with the introduction of analog keyboard technology being one of the most notable innovations.

    Analog keyboards, often compared to their mechanical counterparts, have stirred discussions concerning their efficacy in gaming scenarios.

    This report aims to provide a comprehensive analysis of analog switches for gaming keyboards, examining their features, performance, and how they stack up against traditional mechanical switches.

    What are Analog Keyboards?

    Analog keyboards are input devices that detect varying degrees of keypress depth, similar to how a joystick or trigger on a game controller operates.

    This technology allows for more nuanced control in games, particularly in scenarios that benefit from analog input, such as driving or flying in simulators.

    Analog keyboards can register partial keypresses, offering a range of inputs from a single key, which is not possible with standard digital keyboards that only recognize binary states of ‘pressed’ or ‘not pressed’.

    The Technology Behind Analog Switches

    Analog switches function by measuring the distance a key is pressed, rather than just the actuation point. This enables the keyboard to detect multiple levels of pressure, translating into proportional in-game movement or action.

    The Razer Analog Optical Switch is an example of this technology, offering customizable sensitivity presets for digital/analog inputs, and is featured in keyboards like the Razer Huntsman V2 Analog.

    Advantages of Analog Switches in Gaming

    Analog switches provide a level of control that is akin to what you get with a controller’s analog sticks.

    They are particularly beneficial in genres that require precision and variable input, such as racing games, flight simulators, and stealth games, where gradual movement can be crucial.

    Additionally, the ability to adjust the actuation point can lead to quicker response times, which is advantageous in fast-paced gaming scenarios.

    Are Analog Keyboards Superior for Gaming?

    The superiority of analog keyboards in gaming is not absolute. While they offer additional benefits, their efficacy largely depends on game compatibility.

    Games must be optimized to take advantage of analog input, which is not always the case.

    Moreover, the benefits of analog keyboards are most pronounced in specific genres, and may not provide a significant advantage in others, such as first-person shooters where binary input is typically sufficient.

    Comparison with Mechanical Switches

    Mechanical keyboards are known for their reliability and distinct switch types, which cater to different preferences. Cherry MX switches, for example, come in various forms, including linear, tactile, and clicky, each with different characteristics such as actuation force and feedback.

    While mechanical switches offer consistency and are widely supported in games, they lack the analog input capability that analog switches provide.

    Game Compatibility and User Experience

    The main challenge for analog keyboards is game compatibility. The unique input method requires developers to specifically optimize their games to use the technology.

    Without optimization, the analog functionality may not be utilized, rendering the keyboard equivalent to a standard digital input device.

    Brands and Availability

    Several brands have ventured into the analog keyboard market, including Razer, Wooting, and Cooler Master, each offering their versions of analog keyboards.

    For instance, Razer’s Huntsman V3 Analog showcases the potential of optical switches, while Wooting is known for its own analog input technology.

    Conclusion

    Analog gaming keyboards represent an exciting evolution in gaming peripherals, offering nuanced control that can enhance the gaming experience in certain genres.

    However, their overall superiority is not definitive and is highly dependent on game support and personal preference.

    While they may not completely replace mechanical keyboards, they certainly add another dimension to the gaming experience, providing options for gamers who seek more precise and variable control.

    As the technology matures and more games begin to support analog input, we may see a broader adoption of analog keyboards.

    For now, they remain a specialized tool that can offer significant benefits in the right context but are not universally superior to the well-established mechanical keyboard.

  • Understanding and Addressing Gaming Controller Analog Stick Drift

    Understanding and Addressing Gaming Controller Analog Stick Drift

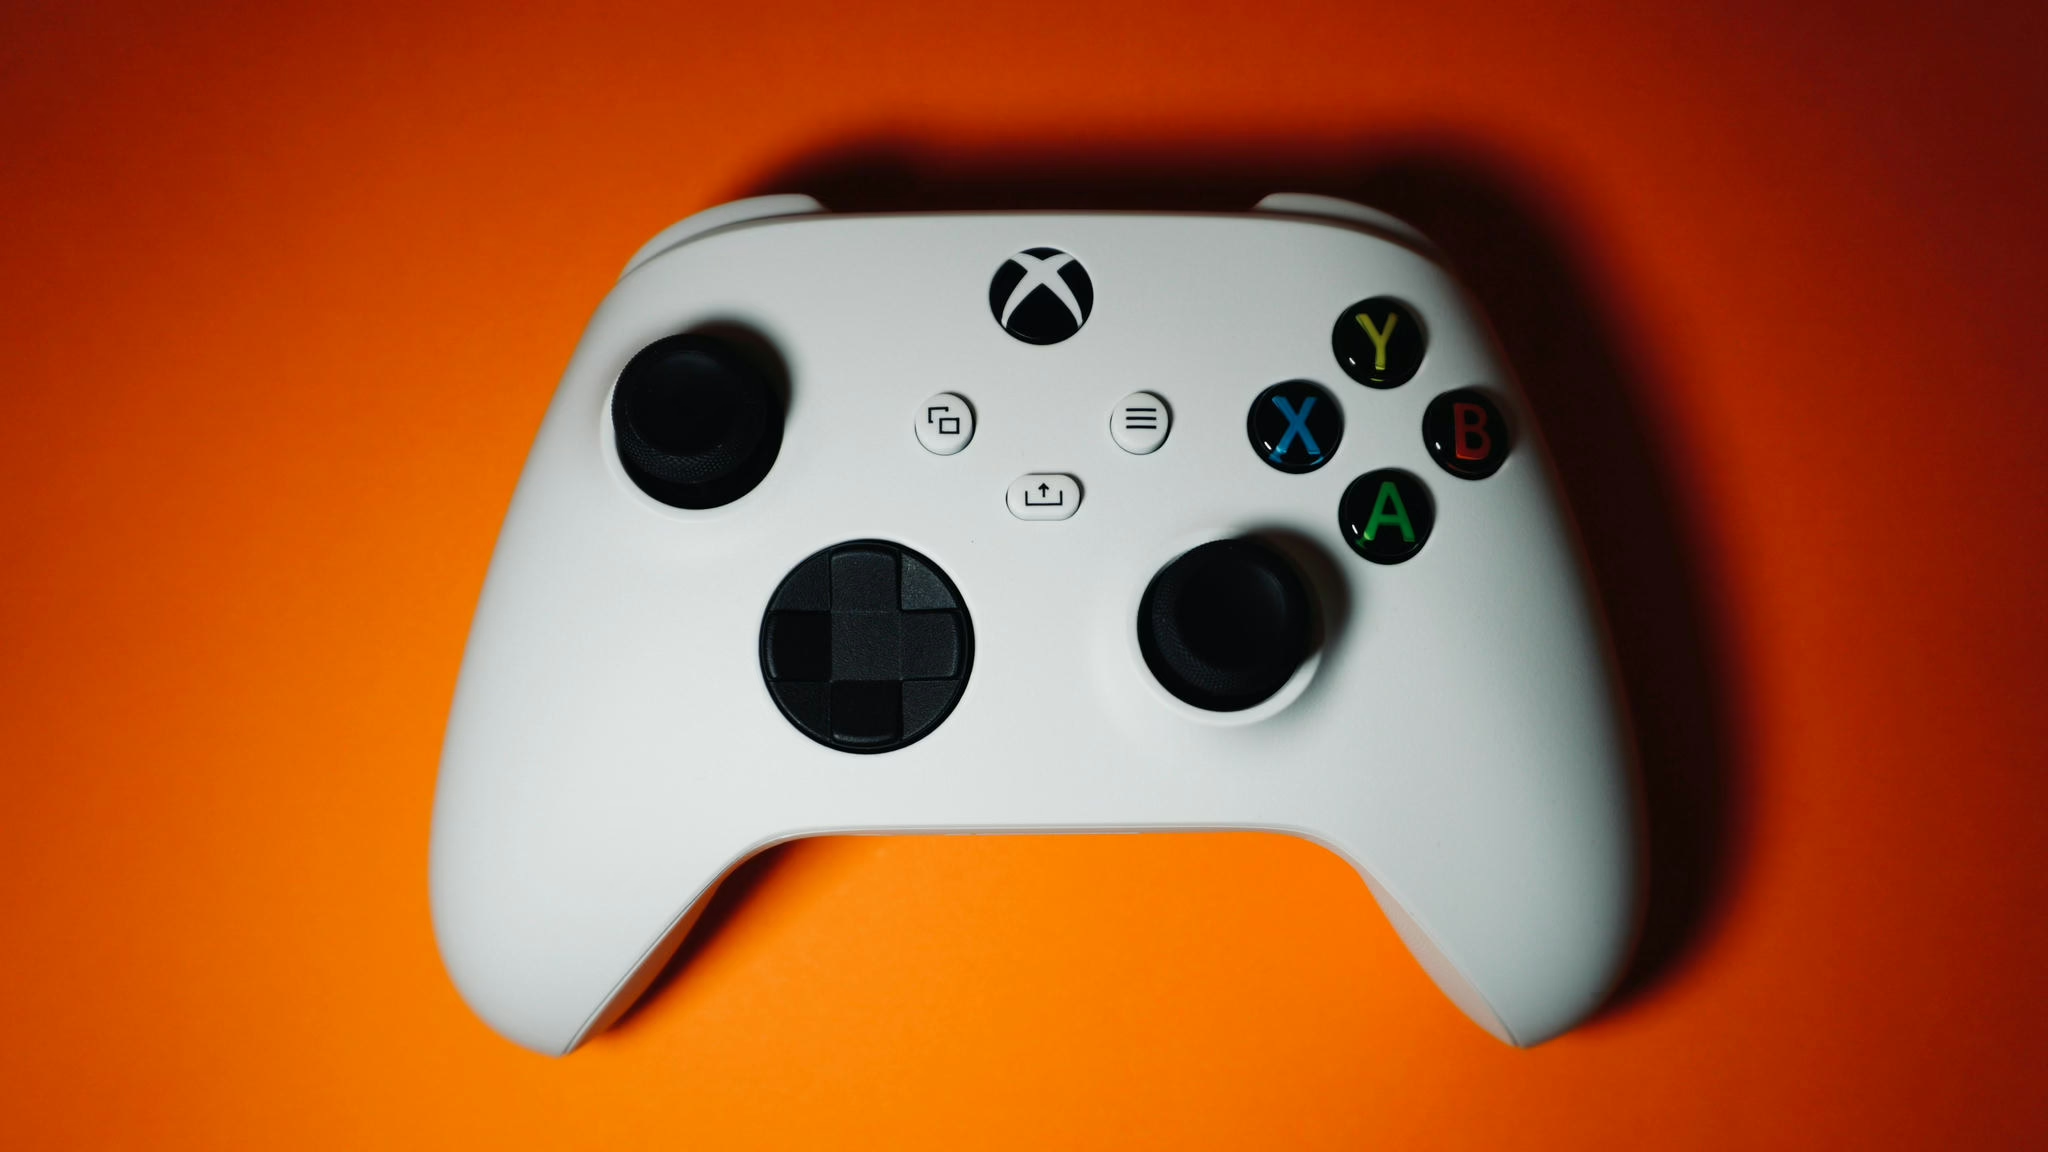
    Analog stick drift, commonly referred to as “stick drift,” is a prevalent issue that affects gaming controllers across various platforms, including Xbox, PlayStation, Nintendo Switch, and PC. This phenomenon occurs when the analog sticks register unintended movements without any user input, causing characters or cursors to move erratically on-screen. Stick drift can significantly hinder gameplay, leading to frustration for casual and competitive gamers alike.

    The root causes of stick drift are multifaceted, ranging from mechanical wear and tear to environmental factors. Over time, components such as potentiometers and springs within the analog stick assembly degrade due to repeated use. Additionally, the accumulation of dust, debris, or grime around the analog stick mechanism can interfere with its functionality. For a deeper understanding of the technical aspects, the ALPS analog stick potentiometer is a critical component often linked to this issue.

    External factors, such as dropping or physically impacting the controller, can also displace internal components, exacerbating the problem. Research from 33rd Square highlights how sudden impacts can knock the analog stick out of calibration, leading to immediate drift issues. Furthermore, outdated firmware or software glitches can contribute to the problem, as noted in discussions on platforms like Reddit.

    Despite its widespread occurrence, stick drift is not an insurmountable problem. Various solutions exist, ranging from simple cleaning methods to advanced repairs. Cleaning the analog stick with isopropyl alcohol or compressed air, as detailed in guides like Tim Gadget Log, can often resolve minor drift issues. For more severe cases, recalibrating the controller, updating firmware, or replacing the analog stick module may be necessary.

    Preventative measures, such as regular maintenance and proper storage, can also help mitigate the risk of stick drift. Resources like Early Finder emphasize the importance of keeping controllers clean and avoiding excessive force during gameplay to prolong their lifespan.

    This guide aims to provide a comprehensive overview of analog stick drift, exploring its causes, prevention strategies, and step-by-step solutions. By understanding the underlying mechanics and adopting proactive measures, gamers can restore their controllers’ precision and enhance their overall gaming experience.

    Causes of analog stick drift

    Mechanical wear and tear

    One of the primary causes of analog stick drift is the mechanical degradation of components over time. Analog sticks rely on potentiometers to measure the position of the joystick. Potentiometers are essentially variable resistors with a wiper that moves along a resistive track. Over extensive use, the following issues can arise:

    • Material Fatigue: The resistive material within the potentiometer can degrade, leading to inaccurate readings. For example, a potentiometer with an ideal resistance of 10k ohms might show deviations, such as 9.5k ohms overall resistance, with imbalances between the wiper and output pins (e.g., 5.5k ohms vs. 5.3k ohms). This imbalance causes the controller to misinterpret the joystick’s neutral position (Instructables).
    • Spring Mechanism Weakening: Springs inside the analog stick assembly are responsible for returning the joystick to its neutral position. Over time, these springs can lose tension, resulting in the stick failing to return to its center accurately.

    The wear and tear of these components are inevitable with regular use, particularly in controllers subjected to high-intensity gaming sessions or frequent directional inputs.

    Dust and debris accumulation

    Environmental factors, such as dust and debris, play a significant role in causing analog stick drift. Dust particles and other contaminants can infiltrate the analog stick housing and disrupt its functionality. Key points include:

    • Impact on Potentiometers: Dust can settle on the resistive track of the potentiometer, creating electrical interference. This contamination can lead to erratic resistance values, causing the controller to register unintended movements (Gaming Pedia).
    • External Contaminants: Substances like grease from hands, crumbs from food, or pet hair can exacerbate the problem. These contaminants can obstruct the movement of the joystick or interfere with the electrical signals.
    • Prevention Measures: Keeping controllers in clean environments, covering them with microfiber cloths when not in use, and avoiding eating or drinking near them can reduce the likelihood of dust-related drift (Gaming Pedia).

    Potentiometer design limitations

    The design of potentiometers in analog sticks inherently contributes to drift over time. While this topic overlaps with mechanical wear, it specifically highlights the limitations of the technology used:

    • Resistance Imbalances: Even in brand-new controllers, potentiometers may not achieve perfect resistance values. For example, a new potentiometer might deviate slightly from the ideal 5k ohms resistance between the wiper and each output pin. These imperfections can worsen with use, leading to drift (Instructables).
    • Manufacturing Variances: Small inconsistencies during production can result in potentiometers that are more prone to drift. These variances may not be noticeable initially but can become problematic as the controller ages.

    Software and firmware issues

    While analog stick drift is predominantly a hardware issue, software and firmware can occasionally contribute to the problem:

    • Calibration Errors: Improper calibration of the analog stick can cause the controller to misinterpret the joystick’s position. This is particularly common after firmware updates or when switching between devices (Codefiner).
    • Deadzone Settings: Deadzones are areas within the joystick’s range of motion where input is ignored. If the deadzone is too small, minor deviations caused by hardware imperfections can result in drift. Adjusting the deadzone settings in games or controller software can mitigate this issue temporarily.

    Environmental and user-handling factors

    External factors, including the environment and how users handle their controllers, can also influence the occurrence of analog stick drift:

    • Humidity and Temperature: Changes in humidity and temperature can affect the materials within the analog stick assembly. For instance, high humidity may cause dust to clump together, increasing the likelihood of interference with the potentiometer (Codefiner).
    • Handling Habits: Rough handling, such as forcefully pressing or moving the joystick, can accelerate wear and tear. Additionally, storing controllers in dusty or damp environments can increase the risk of drift.

    Electrical signal disruptions

    Analog stick drift can also result from disruptions in the electrical signals sent by the joystick to the controller’s circuit board. These disruptions may stem from:

    • Worn Connections: The electrical connections between the potentiometer and the circuit board can degrade over time, leading to inconsistent signal transmission.
    • Voltage Variations: Variations in the voltage supplied to the potentiometer can cause the controller to misinterpret the joystick’s position. This issue is more common in older controllers or those with damaged internal wiring (Instructables).

    Component design trade-offs

    The design of modern gaming controllers often involves trade-offs between cost, durability, and performance. These trade-offs can indirectly contribute to stick drift:

    • Cost Constraints: To keep controllers affordable, manufacturers may use components that are not optimized for long-term durability. For instance, potentiometers with lower-grade materials are more susceptible to wear and tear.
    • Compact Designs: The compact design of modern controllers leaves little room for robust protective measures against dust and debris. This makes the internal components more vulnerable to environmental factors.

    By understanding these causes, both manufacturers and consumers can take steps to mitigate analog stick drift. Manufacturers can focus on improving component durability and design, while consumers can adopt preventive measures to prolong the lifespan of their controllers.

    Methods to fix analog stick drift

    Cleaning the analog stick assembly

    Dust and debris are common culprits behind analog stick drift. Cleaning the analog stick assembly can often resolve the issue without requiring advanced tools or technical expertise. While the existing content on “Dust and Debris Accumulation” discusses the causes of drift, this section focuses on cleaning as a solution.

    1. Compressed Air Cleaning:
      Use a can of compressed air to blow around the analog stick base. Rotate the stick while spraying to dislodge debris trapped inside. This method is effective for removing fine particles that interfere with the potentiometer. (Games Learning Society)
    2. Isopropyl Alcohol Cleaning:
      Dip a cotton swab in isopropyl alcohol (preferably 90% or higher) and gently clean around the base of the analog stick. This removes grease, grime, or stubborn debris that compressed air might miss. Allow the alcohol to evaporate completely before testing the controller. (Hablamos de Gamers)
    3. Preventative Maintenance:
      Regular cleaning every few months can prevent debris build-up. Avoid eating or drinking near controllers and store them in clean, dust-free environments. These measures reduce the risk of future drift. (Gaming Pedia)

    Recalibrating the controller

    Recalibration addresses software-related inaccuracies in joystick input detection. While the existing content on “Software and Firmware Issues” explains calibration errors as a cause, this section focuses on recalibration as a corrective measure.

    1. Manual Recalibration:
      Most gaming platforms offer built-in tools to recalibrate controllers. For example:
    • On Xbox Series X, navigate to Settings > Devices & Accessories > Controllers and follow the on-screen instructions to recalibrate. (Games Learning Society)
    • On PS5, connect the controller via USB, go to Settings > Devices > Controllers, and select “Reset Controller Calibration.” (Hablamos de Gamers)
    1. Game-Specific Deadzone Adjustments:
      Some games allow players to adjust the deadzone settings, which define the range of joystick motion ignored by the system. Increasing the deadzone can mask minor drift issues by requiring greater stick movement before registering input. (wikiHow)
    2. Firmware Updates:
      Ensure the controller’s firmware is up-to-date. Firmware updates often include bug fixes and performance improvements that can resolve calibration issues. (Games Learning Society)
    stick drift

    Repairing or replacing internal components

    When cleaning and recalibration fail, the issue may lie with worn or damaged internal components. This section expands on the topic of “Mechanical Wear and Tear” by detailing repair and replacement methods.

    1. Replacing the Potentiometer:
      The potentiometer, a key component in detecting joystick movement, is prone to wear over time. Replacing it requires soldering skills and access to replacement parts, which can be purchased online. This repair is cost-effective compared to buying a new controller but voids the warranty. (LifeWire)
    2. Analog Stick Replacement Kits:
      Pre-packaged repair kits for analog sticks are available for popular controllers like the Xbox Series X, PS5, and Nintendo Switch. These kits include the necessary tools and components, making the repair process more accessible to non-experts. (ExpertBeacon)
    3. Professional Repair Services:
      If DIY repairs are not feasible, professional repair services can replace damaged components. Many manufacturers, including Microsoft and Sony, offer repair programs for controllers under warranty. For out-of-warranty repairs, third-party services are an alternative. (Games Learning Society)

    Adjusting user habits and handling

    While the existing content on “Environmental and User-Handling Factors” highlights causes, this section focuses on behavioral adjustments to prevent and mitigate stick drift.

    1. Avoid Excessive Force:
      Applying excessive pressure to the analog stick can accelerate wear and tear. Use gentle, deliberate movements during gameplay to prolong the lifespan of the joystick. (Games Learning Society)
    2. Rotate Sticks Regularly:
      Periodically rotate the analog sticks in full circles to distribute wear evenly across the potentiometer. This simple habit can delay the onset of drift. (wikiHow)
    3. Proper Storage:
      Store controllers in a clean, dry environment away from direct sunlight and extreme temperatures. Use protective cases or covers to shield them from dust and debris. (Gaming Pedia)

    Exploring alternative technologies

    This section introduces alternative technologies that could reduce the prevalence of analog stick drift, complementing the discussion on “Component Design Trade-offs.”

    1. Hall Effect Sensors:
      Unlike potentiometers, Hall effect sensors use magnetic fields to detect joystick movement. These sensors are more durable and less prone to wear but are currently more expensive to implement. Some third-party controllers already use this technology. (Nerd Techy)
    2. Capacitive Touch Joysticks:
      Capacitive touch technology, commonly used in touchscreens, could replace traditional analog sticks. This approach eliminates moving parts, reducing the risk of mechanical failure. However, it may lack the tactile feedback gamers expect. (ExpertBeacon)
    3. Modular Controller Designs:
      Modular controllers with easily replaceable analog sticks are gaining popularity. These designs allow users to swap out faulty components without disassembling the entire controller, simplifying repairs. (Games Learning Society)

    By implementing these methods and exploring emerging technologies, gamers can address and potentially prevent analog stick drift in their controllers.

    Preventive measures for analog stick drift

    Regular maintenance practices

    To minimize the risk of analog stick drift, routine maintenance is essential. While some aspects of maintenance overlap with previously discussed cleaning methods, this section focuses on additional preventive measures that go beyond basic cleaning.

    Lubricating analog stick mechanisms

    Applying a small amount of non-conductive, electronics-safe lubricant to the analog stick’s moving parts can reduce friction and wear over time. This practice is especially effective in controllers that experience heavy use. Ensure the lubricant is applied sparingly to avoid attracting dust or debris. This method is distinct from cleaning techniques like using isopropyl alcohol, as it focuses on reducing mechanical wear rather than removing contaminants. (HBZ Guide)

    Periodic internal inspections

    Opening the controller periodically (if the warranty allows) to inspect the internal components for signs of wear, dust, or debris can help catch potential issues early. Use an anti-static brush to clean sensitive areas during inspections. This preventive measure is more proactive compared to external cleaning methods and requires a higher level of technical skill. (Fix It Insider)

    Replacing worn components

    For controllers with replaceable analog stick modules, replacing the potentiometers or thumbstick assemblies before they fail can prevent drift. This approach requires identifying signs of wear, such as reduced responsiveness or uneven resistance during gameplay. Unlike reactive fixes, this method is preemptive, ensuring consistent performance over time. (ExpertBeacon)

    Environmental control

    Environmental factors play a significant role in the longevity of gaming controllers. While existing content has touched on the impact of humidity and temperature, this section expands on creating an optimal storage and usage environment.

    Controlled storage conditions

    Store controllers in an environment with stable temperature and humidity levels. Use silica gel packets in storage containers to absorb excess moisture, which can lead to dust clumping and potentiometer interference. This is a more advanced storage solution compared to simply keeping controllers in a dry place. (Games Learning Society)

    Minimizing exposure to particulates

    Avoid using controllers in environments with high levels of airborne particulates, such as near open windows or in rooms with ongoing construction. Using protective covers or cases when the controller is not in use can further shield it from dust and debris. This builds on the idea of proper storage by focusing on active usage environments. (TechFanzine)

    Anti-static measures

    Static electricity can damage sensitive electronic components within the controller. Gamers can reduce static buildup by using anti-static mats or wrist straps when handling controllers, particularly during cleaning or maintenance. This preventive measure is unique and not covered in existing content. (Fix It Insider)

    Optimizing controller settings

    Adjusting software settings can help mitigate the effects of drift and prolong the usability of the controller. This section focuses on preventive adjustments rather than reactive fixes like recalibration.

    Increasing deadzone settings

    Increasing the deadzone in games or controller software can prevent minor deviations from being registered as input. While this does not eliminate drift, it reduces its impact on gameplay. This approach complements hardware maintenance by addressing software-level sensitivity. (GamersWiki)

    Customizing sensitivity profiles

    Some controllers allow users to create custom sensitivity profiles for different games. Lowering sensitivity in non-critical areas of the joystick’s range can reduce wear on potentiometers, thereby delaying the onset of drift. This method is distinct from recalibration, as it focuses on proactive customization. (Games Learning Society)

    Firmware updates

    Regularly updating the controller’s firmware ensures it has the latest bug fixes and optimizations. Manufacturers often release updates to address known issues, including those that may contribute to drift. This preventive measure is more general than recalibration and applies to all users, regardless of whether drift has occurred. (OneSaharan)

    Improved handling techniques

    Proper handling of controllers can significantly reduce the likelihood of drift. While existing content has discussed avoiding excessive force, this section introduces additional techniques to enhance durability.

    Avoiding rapid stick movements

    Repeated rapid movements, such as flicking the analog stick during intense gameplay, can accelerate wear on the potentiometer. Gamers should aim for smooth, deliberate movements to reduce strain on internal components. This advice is more specific than general recommendations to avoid rough handling. (HBZ Guide)

    Using thumbstick grips

    Silicone thumbstick grips can reduce direct wear on the analog stick surface and improve user control. These grips are inexpensive and easy to replace, making them a practical addition to any controller. This method complements existing suggestions for protective covers by focusing on the thumbstick itself. (Fix It Insider)

    Rotating controllers

    For gamers who own multiple controllers, rotating their usage can distribute wear evenly across devices. This approach is particularly useful for competitive players who put significant strain on their equipment. While similar to rotating analog sticks, this method applies to the entire controller. (ExpertBeacon)

    Investing in durable alternatives

    For gamers seeking long-term solutions, investing in controllers with advanced technologies can reduce the risk of drift. This section explores alternatives that go beyond traditional analog stick designs.

    Hall effect joysticks

    Controllers equipped with Hall effect sensors use magnetic fields to detect movement, eliminating physical contact between components. This design significantly reduces wear and is increasingly available in premium controllers. While previously mentioned as an alternative technology, this section emphasizes its preventive benefits. (Nerd Techy)

    Modular controllers

    Some manufacturers offer controllers with modular analog sticks, allowing users to replace worn components without disassembling the device. This feature extends the controller’s lifespan and reduces maintenance costs. This approach is distinct from replacing components in traditional controllers, as it requires no technical expertise. (TechFanzine)

    Premium build materials

    High-end controllers often use more durable materials, such as metal housings and reinforced potentiometers, to withstand heavy use. While these controllers are more expensive, their longevity can offset the initial investment. This method focuses on preventive durability rather than reactive fixes. (ExpertBeacon)

    ps5 controller black

    Conclusion

    Analog stick drift, a prevalent issue in gaming controllers, arises from a combination of mechanical wear, environmental factors, design limitations, and occasional software inaccuracies. The primary causes include the degradation of potentiometers due to material fatigue, weakening of internal springs, and the accumulation of dust and debris, which disrupt electrical signals and joystick functionality. Design trade-offs, such as cost constraints and compact layouts, further exacerbate the problem, while improper calibration and inadequate deadzone settings can amplify the effects of drift. External factors, such as rough handling, humidity, and temperature fluctuations, also contribute to the issue, highlighting the multifaceted nature of this challenge.

    Addressing analog stick drift requires a combination of corrective and preventive measures. Cleaning the analog stick assembly with compressed air or isopropyl alcohol can resolve minor issues, while recalibration and firmware updates address software-related inaccuracies. For more severe cases, replacing worn components like potentiometers or utilizing professional repair services may be necessary. Preventive strategies, such as regular maintenance, proper storage, and adopting improved handling habits, can significantly reduce the likelihood of drift. Moreover, exploring alternative technologies like Hall effect sensors, modular controller designs, and capacitive touch joysticks offers promising long-term solutions to mitigate this issue. These advancements, while potentially more expensive, provide enhanced durability and performance compared to traditional potentiometer-based designs.

    The implications of this research suggest that both manufacturers and consumers have roles to play in combating analog stick drift. Manufacturers should prioritize the development of more durable components and explore innovative technologies to minimize drift, while consumers can adopt better maintenance practices and handling techniques to prolong the lifespan of their controllers. As gaming technology evolves, integrating advanced sensor technologies and modular designs into mainstream controllers could redefine industry standards, offering gamers more reliable and sustainable hardware. For more details on preventive measures and emerging solutions, refer to resources like Games Learning Society and Nerd Techy.

  • Gaming Mouse Button Pre-Travel: What it is and How to Fix It

    Pre-travel in gaming mice is a critical consideration for gamers seeking precision and responsiveness in their peripherals. Pre-travel refers to the distance a mouse button must move before it actuates the switch and registers a click. This seemingly minor aspect can significantly impact gaming performance, especially in competitive scenarios where split-second reactions are crucial.

    This guide delves into the concept of pre-travel, its causes, how it affects gaming performance, and methods to address it. The information is drawn from various reliable sources and aims to provide a comprehensive understanding of this topic.

    What is pre-travel in gaming mice?

    Pre-travel occurs when there is a gap or play between the mouse button plunger and the switch. This gap means that the button needs to travel a certain distance before making contact with the switch to register a click. While this might seem negligible, it can lead to delayed input, which is particularly problematic in fast-paced gaming environments.

    Causes of pre-travel

    Pre-travel is primarily caused by the design and construction of the mouse. The following factors contribute to pre-travel:

    1. Button Plunger Design: The plunger, which connects the mouse button to the switch, may have excess space or play, leading to pre-travel.
    2. Switch Placement: Misalignment or improper placement of the switch relative to the button can increase pre-travel.
    3. Manufacturing Tolerances: Variations in manufacturing tolerances can result in inconsistent pre-travel across different units of the same model.
    4. Material Wear: Over time, materials such as plastic or metal may wear down, exacerbating pre-travel.

    Impact of pre-travel on gaming performance

    Pre-travel can have a noticeable impact on gaming performance, particularly in competitive gaming. Here are some key effects:

    1. Delayed Input: The additional distance the button must travel can introduce a delay in registering clicks. This delay, even if measured in milliseconds, can be the difference between victory and defeat in competitive gaming.
    2. Reduced Precision: Pre-travel can make it harder to achieve precise inputs, as the user must account for the extra movement.
    3. Fatigue: Excessive pre-travel may require more force or movement, leading to hand fatigue during extended gaming sessions.
    4. Inconsistent Feedback: The variability in pre-travel across buttons or units can lead to inconsistent tactile feedback, affecting the gaming experience.

    Fixing pre-travel in gaming mice

    Fortunately, pre-travel can be addressed through various methods. These fixes range from simple DIY solutions to professional modifications. Below are some of the most effective techniques:

    1. Using Aluminum Tape

    One of the most popular DIY methods to reduce pre-travel is by using aluminum tape. This method involves placing layers of tape on the mouse button plunger to reduce the gap between the plunger and the switch. Here’s how it works:

    • Materials Needed: Aluminum tape, scissors or an exacto knife, and new mouse feet (optional).
    • Process:
    1. Open the mouse and locate the button plunger.
    2. Cut the aluminum tape to match the size of the plunger.
    3. Stick the tape to the plunger where it contacts the switch.
    4. Test the button by closing the mouse without screwing it together. Adjust the number of tape layers as needed.
    5. Reassemble the mouse once the desired pre-travel reduction is achieved (Mouse Mods Wiki).

    This method is effective because aluminum tape is thin and allows for precise adjustments. However, care must be taken not to use too many layers, as this can make the button actuate too easily.

    2. Using Electrical Tape

    Electrical tape is another option for reducing pre-travel. It is thinner than aluminum tape, making it suitable for fine-tuning. The process is similar to using aluminum tape, but the thinner material allows for more subtle adjustments (Mouse Mods Wiki).

    3. Professional Modifications

    For those who are not comfortable with DIY fixes, professional modifications are an option. Some companies and individuals specialize in customizing gaming mice, including reducing pre-travel. This option ensures a precise and reliable fix but may be more expensive.

    4. Replacing The Switches

    In some cases, replacing the switches with higher-quality or low-profile switches can reduce or eliminate pre-travel. This method requires technical expertise and may void the warranty of the mouse.

    Gaming mice with minimal pre-travel

    Some gaming mice are designed with minimal pre-travel out of the box, making them ideal for competitive gamers. Here are a few examples:

    1. Logitech G Pro X Superlight 2: This mouse is known for its lightweight design and responsive buttons, making it a top choice for competitive gaming (Tom’s Guide).
    2. Razer Viper V2 Pro: With its low-profile switches and fast actuation, this mouse minimizes pre-travel and is ideal for FPS games (Trusted Reviews).
    3. SteelSeries Rival 3: A budget-friendly option with excellent build quality and minimal pre-travel (Tom’s Guide).

    Conclusion

    Pre-travel in gaming mice is a critical factor that can affect gaming performance, particularly in competitive scenarios.

    While it is caused by design and manufacturing factors, it can be addressed through DIY fixes such as using aluminum or electrical tape, professional modifications, or selecting high-quality gaming mice designed to minimize pre-travel.

    Gamers should consider their specific needs and preferences when addressing pre-travel to enhance their gaming experience.

    By understanding and addressing pre-travel, gamers can achieve faster response times, improved precision, and a more enjoyable gaming experience.

  • Mastering NVIDIA DLSS for Enhanced Gaming Performance & Better Visuals

    NVIDIA’s Deep Learning Super Sampling (DLSS) technology has undergone significant evolution since its inception in 2018. Initially introduced to enhance gaming performance by leveraging AI, DLSS has continuously adapted to meet the increasing demands of modern gaming and creative applications. The technology has progressed from its original form to the latest iteration, DLSS 3.5, which incorporates advanced features like Ray Reconstruction. This evolution reflects NVIDIA’s commitment to pushing the boundaries of AI-enhanced graphics, allowing for more immersive and visually stunning experiences in gaming and beyond (NVIDIA News).

    Core functionality and mechanism

    DLSS operates by rendering frames at a lower resolution and then using AI algorithms to upscale these frames to a higher resolution. This process significantly boosts performance by reducing the computational load on the GPU while maintaining image quality. The AI model, trained on a vast dataset of high-quality images, predicts and reconstructs the missing pixels, resulting in sharp and detailed visuals that rival native resolution rendering. This capability is particularly beneficial in resource-intensive scenarios, such as ray tracing, where maintaining high frame rates is challenging (DoteSports).

    Dlss 3: frame generation and performance boost

    DLSS 3 introduces a groundbreaking feature known as Frame Generation, which allows the AI to generate entire frames in real-time. This innovation not only boosts frame rates but also addresses CPU bottlenecks by offloading more processing tasks to the GPU. By analyzing two consecutive frames, DLSS 3 can generate a third frame, effectively increasing the frames per second (FPS) and enhancing the overall gaming experience. This feature is exclusive to NVIDIA’s 40 Series GPUs, which are equipped with the necessary hardware to support this advanced AI processing (NVIDIA News).

    Ray tracing and ray reconstruction

    A significant advancement in DLSS 3.5 is the introduction of Ray Reconstruction technology. This feature replaces traditional hand-tuned ray tracing denoisers with a unified AI model, enhancing the quality of ray-traced images. Ray Reconstruction improves the visual fidelity of games by accurately simulating light interactions, shadows, and reflections, creating more realistic and immersive environments. This enhancement is particularly evident in games that support full ray tracing, where the demand for high-quality rendering is paramount (TechPowerUp).

    Integration with nvidia reflex and system latency reduction

    In addition to enhancing visual performance, DLSS technology integrates with NVIDIA Reflex to reduce system latency. This integration is crucial for competitive gaming, where responsiveness and precision are critical. By minimizing the delay between player input and on-screen action, NVIDIA Reflex ensures a smoother and more responsive gaming experience. This feature is available across all GeForce RTX GPUs, providing a consistent advantage to gamers who prioritize low latency (NVIDIA Developer Blog).

    Adoption and industry impact

    Since its launch, DLSS has been adopted by over 600 games and applications, demonstrating its widespread acceptance and impact on the gaming industry. The technology’s ability to enhance performance without compromising image quality has made it a valuable tool for developers and gamers alike. DLSS’s integration into major gaming franchises such as Diablo IV and Forza Horizon 5 highlights its role in shaping the future of gaming graphics. The rapid adoption of DLSS 3, with its advanced features, underscores the industry’s recognition of AI’s potential in revolutionizing game rendering (NVIDIA News).

    Future prospects and developments

    Looking ahead, NVIDIA continues to innovate and expand the capabilities of DLSS technology. With the upcoming release of the GeForce RTX 50 Series “Blackwell” GPUs, further enhancements in AI-driven graphics performance are anticipated. These developments promise to deliver even greater improvements in frame rates, image quality, and overall gaming experiences. As NVIDIA pushes the boundaries of what is possible with AI and graphics, DLSS remains at the forefront of this technological revolution, setting new standards for the industry (TechPowerUp).

    In summary, NVIDIA DLSS technology represents a significant advancement in AI-enhanced graphics rendering. Its ability to boost performance, improve image quality, and reduce system latency has made it an essential tool for modern gaming and creative applications. As the technology continues to evolve, it is poised to play a pivotal role in shaping the future of digital graphics.

    Comparison with competing technologies

    Amd fidelityfx super resolution (FSR) vs. nvidia dlss

    NVIDIA’s Deep Learning Super Sampling (DLSS) and AMD’s FidelityFX Super Resolution (FSR) are both prominent upscaling technologies designed to enhance gaming performance and visual quality. While both aim to improve frame rates and image clarity, they differ significantly in their underlying technologies and performance outcomes.

    Technological Approach
    DLSS leverages deep learning and artificial intelligence to upscale images. It utilizes neural networks to reconstruct details and textures from lower resolution images to higher resolutions. This approach allows DLSS to deliver high-quality images with minimal artifacts. In contrast, FSR employs a combination of bilinear upscaling and machine learning. It focuses on reconstructing details and textures but does not rely as heavily on AI-driven processes as DLSS (Digital Trends).

    Performance and Image Quality
    DLSS is often praised for its superior image quality, particularly when real-time ray tracing is activated. It provides clearer and more stable images, reducing blurring and artifacts that can occur during fast movements. FSR, while offering commendable performance improvements, tends to produce slightly softer images with potential aliasing issues. However, FSR 3 has shown improvements in sharpness and detail retention, though it still lags behind DLSS in scenarios involving complex lighting and ray tracing (PCWorld).

    Compatibility and Hardware Requirements
    One of the key advantages of FSR is its broad compatibility. It is designed to work across a wide range of hardware, including older and non-AMD graphics cards. This makes it accessible to a larger audience, including users of budget and mid-range GPUs. DLSS, on the other hand, is exclusive to NVIDIA’s RTX series, requiring specific hardware capabilities found in Turing and Ampere architectures (Hardware Times).

    Game Support and Adoption
    DLSS has been available longer than FSR, leading to wider adoption in the gaming industry. It is supported by a larger number of games, and its integration is often seen as a selling point for NVIDIA GPUs. However, FSR’s open nature and ease of implementation have allowed it to quickly gain traction, with many developers opting to include both DLSS and FSR in their titles to cater to a broader audience (Digital Trends).

    Intel xess vs. nvidia dlss

    Intel’s Xe Super Sampling (XeSS) is another competitor in the upscaling technology space, aiming to challenge both DLSS and FSR. XeSS is Intel’s AI-driven solution designed to upscale images from lower resolutions to higher ones, similar to DLSS.

    Technological Foundations
    XeSS employs a temporal AI algorithm that adds detail to upscaled images using previously recorded image data. This is akin to DLSS’s use of neural networks, but XeSS is designed to be more hardware-agnostic, capable of running on both Intel and non-Intel GPUs. However, when running on non-Intel hardware, XeSS may not perform as efficiently as DLSS due to the lack of dedicated AI hardware acceleration (Tom’s Hardware).

    Performance Comparison
    In terms of performance, XeSS has shown promising results, often matching or exceeding the performance of older DLSS versions. However, DLSS 3.5, with its Ray Reconstruction feature, offers enhanced image quality and performance, particularly in ray-traced environments. XeSS’s performance is more variable, depending on the hardware it runs on and the specific game implementation (Eurogamer).

    Image Quality
    While XeSS provides competitive image quality, it may not reach the same level of detail and clarity as DLSS, especially in complex scenes with ray tracing. DLSS’s advanced AI models and dedicated hardware support give it an edge in maintaining high image fidelity with fewer artifacts (TechPowerUp).

    Ray tracing and upscaling technologies

    Ray tracing is a critical component of modern graphics rendering, simulating realistic lighting effects by tracing the path of light as pixels in an image. DLSS’s integration with ray tracing is a significant advantage, as it enhances the visual quality of ray-traced scenes by reducing noise and improving detail through AI-driven denoising techniques. This capability is particularly beneficial in games like Cyberpunk 2077, where DLSS 3.5’s Ray Reconstruction feature significantly enhances the visual experience (Trusted Reviews).

    FSR and XeSS also support ray tracing, but their effectiveness varies. FSR lacks the advanced AI-driven denoising found in DLSS, resulting in less effective noise reduction and detail preservation in ray-traced scenes. XeSS, while capable of handling ray tracing, may not match DLSS’s performance in maintaining image quality under the computational demands of real-time ray tracing (PCWorld).

    Market position and future prospects

    NVIDIA DLSS has established itself as a leader in the upscaling technology market, primarily due to its early introduction and continuous advancements. Its integration with NVIDIA’s hardware ecosystem and support for cutting-edge features like Ray Reconstruction solidify its position as a preferred choice for gamers seeking the best visual experience.

    FSR’s open nature and broad compatibility make it a strong contender, especially for users with non-NVIDIA hardware. Its rapid adoption by developers and improvements in newer versions suggest a promising future, though it may continue to trail DLSS in terms of image quality in certain scenarios.

    Intel’s XeSS, as a newcomer, shows potential with its flexible hardware support and competitive performance. Its success will largely depend on Intel’s ability to optimize the technology across various platforms and secure widespread game support.

    In summary, while DLSS currently leads in performance and image quality, FSR and XeSS offer viable alternatives with their unique strengths, catering to different segments of the gaming community. The ongoing advancements in these technologies promise continued competition and innovation in the upscaling domain.

    Future developments and innovations in dlss

    Ai-driven texture and object generation

    NVIDIA’s DLSS technology is poised for significant advancements in AI-driven texture and object generation. According to Jensen Huang, NVIDIA’s CEO, future iterations of DLSS will leverage AI to create in-game textures and objects autonomously. This development aims to enhance gaming performance by offloading tasks to tensor cores, thus reducing the load on shader (CUDA) cores. This shift not only promises to boost frame rates but also improve object quality, akin to how DLSS currently upscales frames. This innovation marks a departure from traditional rendering techniques, offering a more efficient and visually appealing gaming experience.

    Dlss ray reconstruction and enhanced ray tracing

    Building on the existing capabilities of DLSS 3.5, NVIDIA has introduced DLSS Ray Reconstruction technology. This feature replaces conventional hand-tuned ray tracing denoisers with a unified AI model, significantly enhancing ray tracing quality in supported games (NVIDIA News). This advancement allows for more realistic simulations of light interactions, shadows, and reflections, creating immersive environments. The integration of DLSS Ray Reconstruction is particularly beneficial for games that support full ray tracing, where high-quality rendering is crucial.

    Integration with unreal engine and game development

    NVIDIA’s collaboration with Unreal Engine is set to revolutionize game development by integrating DLSS 3 features into Unreal Engine 5.2. This integration facilitates the utilization of DLSS technology in creating high-performance, visually stunning games (NVIDIA Developer Blog). By leveraging DLSS, developers can achieve higher frame rates and enhanced image quality, even in resource-intensive scenarios. This partnership underscores NVIDIA’s commitment to providing developers with cutting-edge tools to push the boundaries of game graphics.

    Expansion of dlss support in upcoming games

    NVIDIA plans to expand DLSS support across a wide range of upcoming PC titles, providing a strong incentive for gamers to upgrade their hardware. Notable games such as Dragon’s Dogma 2, Like a Dragon: Infinite Wealth, and Gray Zone Warfare are set to launch with DLSS 3 support (Dot Esports). Additionally, popular titles like Diablo 4 and Horizon: Forbidden West will receive updates to incorporate DLSS 3 technology. This widespread adoption highlights the growing recognition of DLSS as a critical component in delivering enhanced gaming experiences.

    Upcoming hardware and dlss compatibility

    NVIDIA’s upcoming release of three new 40-series Super GPUs in 2024 is expected to further enhance DLSS compatibility and performance. These GPUs are designed to support the latest DLSS innovations, providing gamers with the hardware necessary to fully leverage DLSS 3 and future iterations (Dot Esports). The introduction of these GPUs aligns with NVIDIA’s strategy to continuously improve AI-driven graphics performance, ensuring that DLSS remains at the forefront of gaming technology.

    Ai-generated non-player characters (NPCs)

    In addition to texture and object generation, future DLSS iterations may include AI-generated non-player characters (NPCs). This development, as hinted by Jensen Huang, aims to enhance the realism and interactivity of gaming environments. By utilizing DLSS to generate NPCs, developers can create more dynamic and engaging gameplay experiences. This innovation represents a significant step forward in the application of AI in gaming, offering new possibilities for character design and interaction.

    Texture compression and ai neural networks

    NVIDIA is actively working on a new texture compression technology that incorporates trained AI neural networks. This technology aims to optimize texture quality while minimizing resource usage, further enhancing gaming performance (Tom’s Hardware). By leveraging AI neural networks, NVIDIA seeks to improve texture compression efficiency, allowing for more detailed and realistic visuals without compromising performance. This development is expected to play a crucial role in the next iteration of DLSS technology.

    Dlss and system latency reduction

    DLSS technology continues to evolve with a focus on reducing system latency, a critical factor in enhancing gaming responsiveness. The integration of NVIDIA Reflex with DLSS 3 reduces system latency for all GeForce RTX users, making games more responsive (NVIDIA News). This feature is particularly beneficial for competitive gaming, where low latency is essential for optimal performance. By addressing system latency, NVIDIA aims to provide a smoother and more immersive gaming experience.

    Ai-enhanced graphics rendering

    As NVIDIA pushes the boundaries of AI-enhanced graphics rendering, DLSS remains a pivotal component in shaping the future of digital graphics. The ongoing advancements in DLSS technology promise to deliver even greater improvements in frame rates, image quality, and overall gaming experiences (TechPowerUp). With the anticipated release of the GeForce RTX 50 Series “Blackwell” GPUs, further enhancements in AI-driven graphics performance are expected. These developments underscore NVIDIA’s commitment to setting new standards for the industry and revolutionizing the gaming landscape.

    Conclusion

    The future of NVIDIA DLSS technology is marked by significant innovations and developments that promise to enhance gaming performance and visual quality. From AI-driven texture and object generation to the integration of DLSS with Unreal Engine, these advancements highlight NVIDIA’s commitment to pushing the boundaries of gaming technology. As DLSS continues to evolve, it is poised to play a pivotal role in shaping the future of digital graphics, offering gamers and developers new possibilities for creating immersive and visually stunning experiences.