Category: Troubleshooting

  • Troubleshoot Logitech g pro x superlight 2: a comprehensive guide

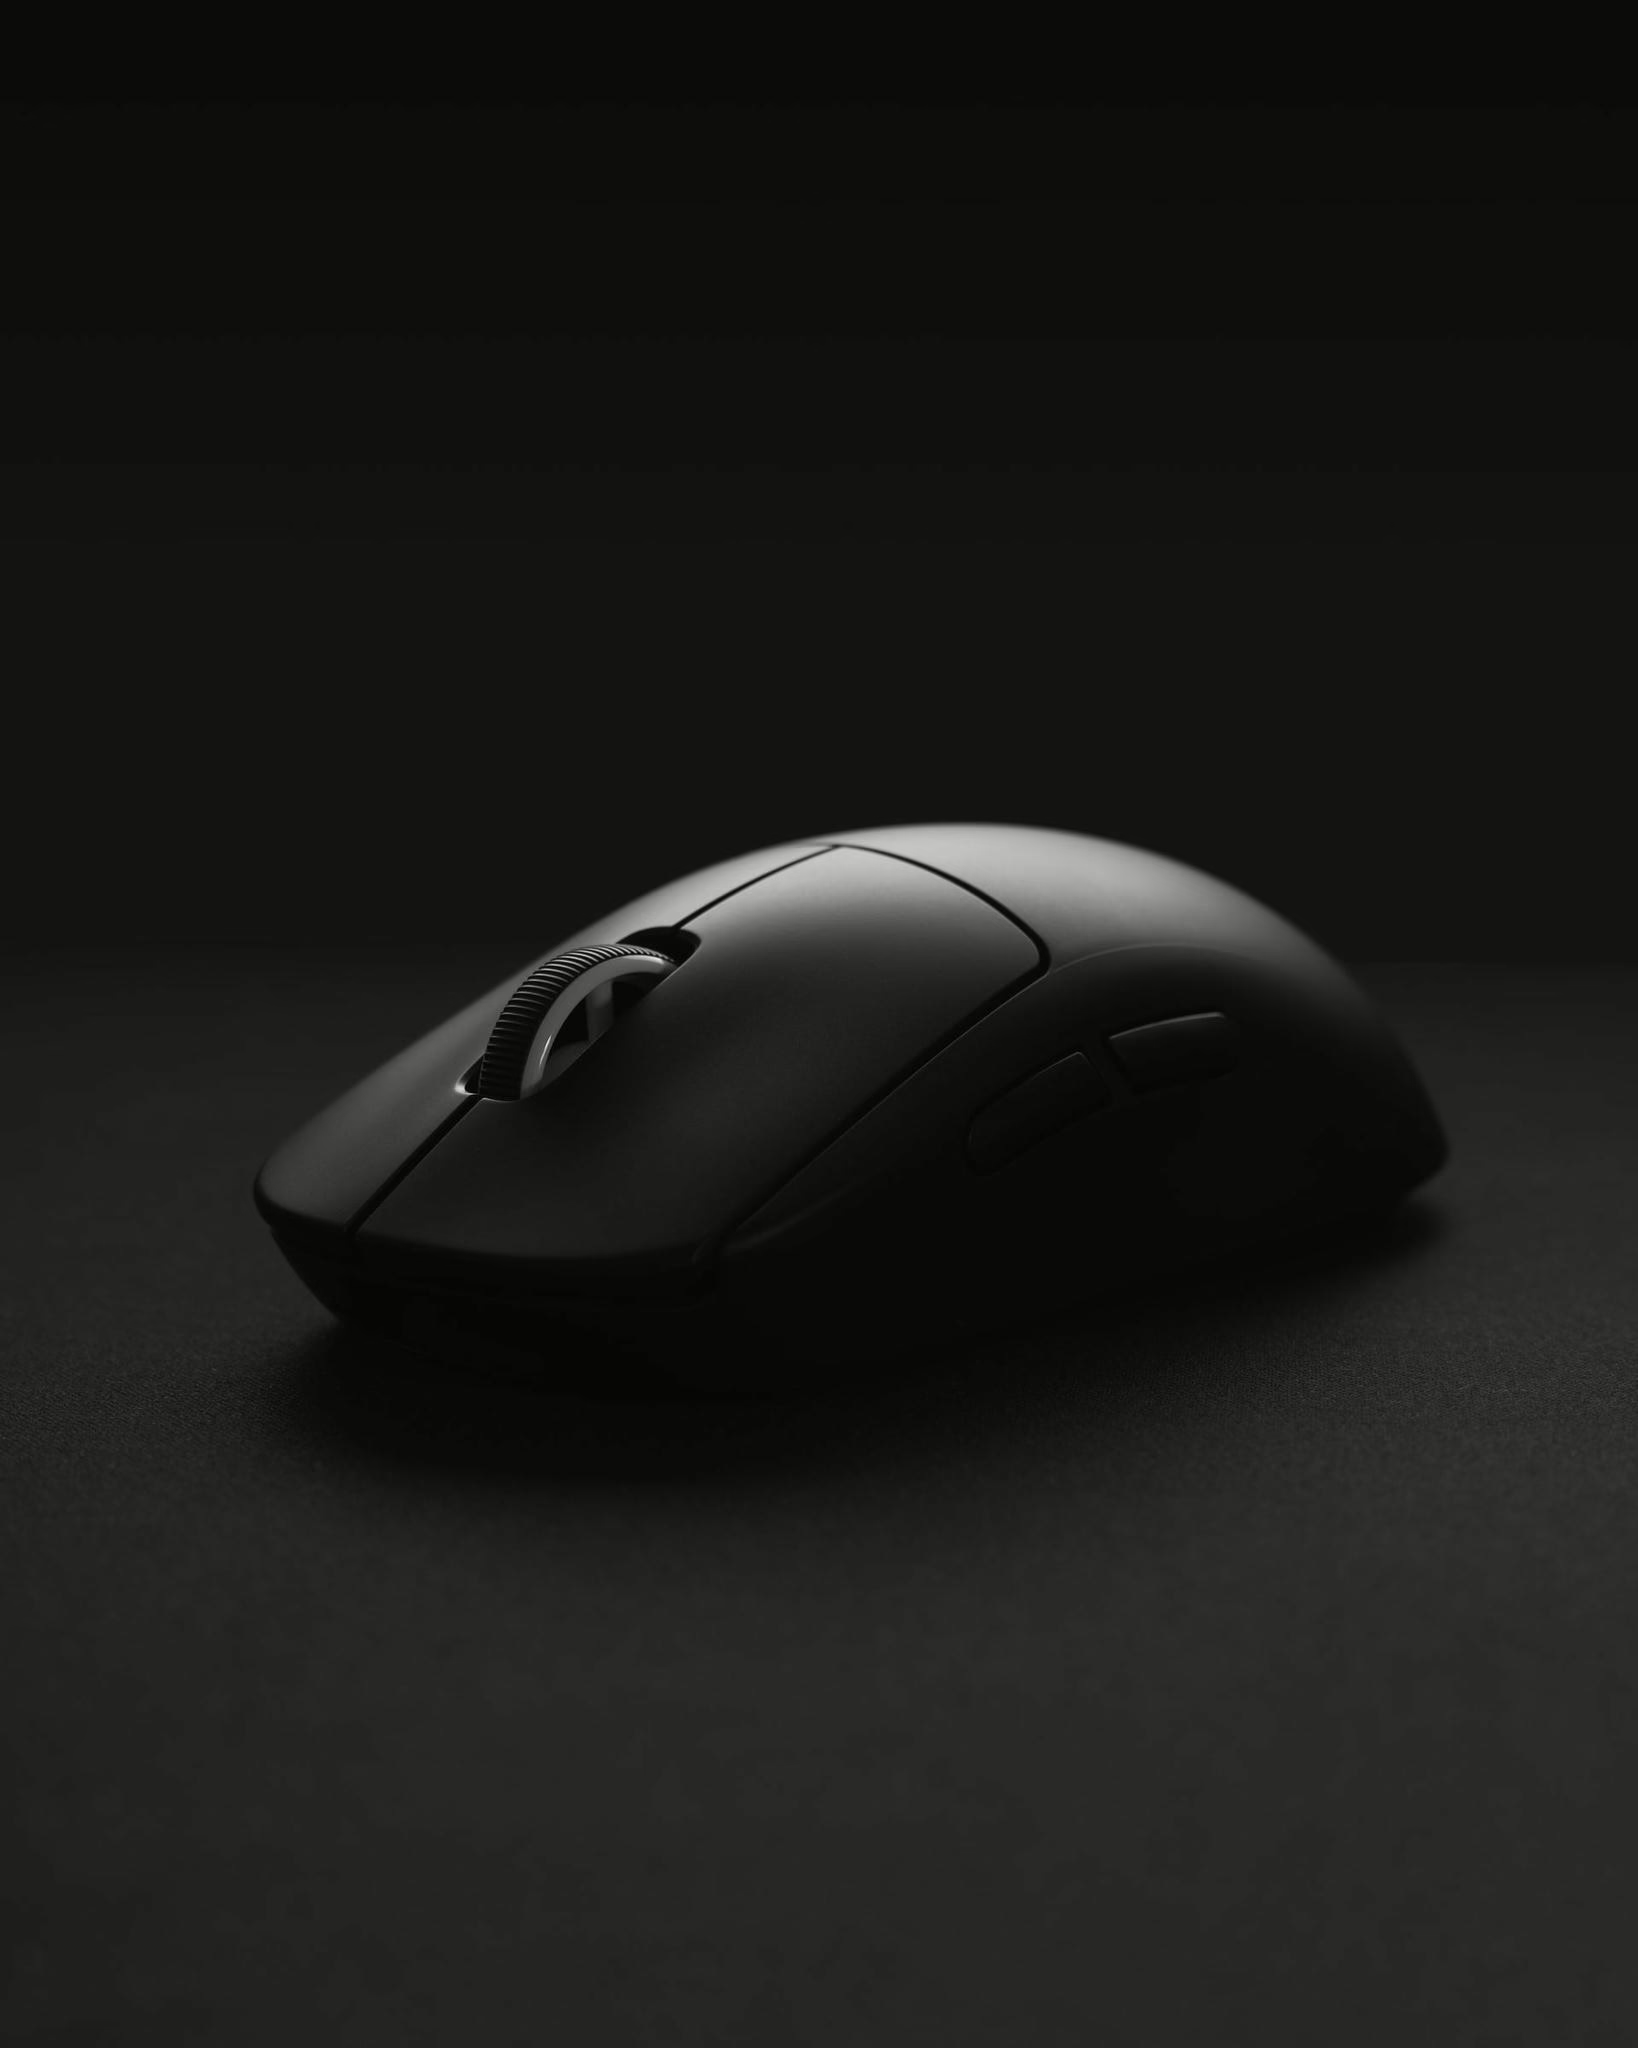
    The Logitech G PRO X SUPERLIGHT 2 is a premium wireless gaming mouse designed for competitive gamers seeking lightweight performance and precision. However, like any electronic device, it may encounter issues that can hinder its functionality.

    This guide provides a detailed troubleshooting guide for common problems reported by users, based on the information provided from various sources. The goal is to help users identify and resolve these issues effectively.

    Common issues with the logitech g pro x superlight 2

    1.1 Connectivity Problems

    Connectivity issues are among the most frequently reported problems with the Logitech G PRO X SUPERLIGHT 2. These issues often manifest as:

    • The mouse not pairing with the USB receiver.
    • Intermittent disconnection during use.
    • The mouse not functioning in wireless or wired mode.

    1.2 Tracking or cursor Issues

    Tracking issues can significantly impact the user experience. Common symptoms include:

    • The cursor not moving smoothly or freezing intermittently.
    • The cursor skipping or lagging during gameplay.
    • The mouse failing to track movements on certain surfaces.

    1.3 Power and charging Issues

    Some users have reported problems with the mouse not powering on or charging. Symptoms include:

    • The battery indicator light not turning on.
    • The mouse not functioning even when connected via the USB cable.
    • Overheating in certain areas of the mouse.

    1.4 Button responsiveness and scroll wheel Malfunctions

    Issues with button responsiveness or the scroll wheel can include:

    • Buttons not registering clicks consistently.
    • The scroll wheel skipping or not functioning properly.

    Troubleshooting Steps

    2.1 Resolving connectivity Problems

    To address connectivity issues, follow these steps:

    1. Check the USB Receiver:
    • Ensure the USB receiver is securely plugged into a functioning USB port. Preferably, use a port on the back of your computer to minimize interference (9meters).
    • If the receiver is loose or damaged, consider replacing it.
    1. Reduce Wireless Interference:
    • Keep other wireless devices, such as Bluetooth keyboards or mice, away from the receiver to reduce interference (9meters).
    1. Update or Reinstall Drivers:
    • Ensure the Logitech G HUB software is up to date. If the issue persists, uninstall and reinstall the software (9meters).
    1. Re-pair the Mouse:
    • Use the Device Pairing Tool in Logitech G HUB to re-pair the mouse with the receiver. If the mouse is not detected, ensure it is powered on and within range (Tom’s Hardware).
    1. Check the Battery:
    • Ensure the mouse is adequately charged. A low battery can cause connectivity issues (9meters).

    2.2 Fixing tracking or cursor Issues

    Tracking issues can often be resolved by addressing the following:

    1. Clean the Sensor:
    • Dust or debris on the sensor can disrupt tracking. Use a soft, lint-free cloth to clean the sensor (9meters).
    1. Check the Surface:
    • Ensure the mouse is used on a compatible surface. Some users have reported issues on reflective or glass surfaces. Using a high-quality mouse pad can improve tracking (Reddit).
    1. Adjust DPI Settings:
    • Open Logitech G HUB and adjust the DPI settings to ensure they are configured correctly for your needs (SoundScapeHQ).
    1. Update Firmware:
    • Outdated firmware can cause tracking issues. Check for firmware updates in Logitech G HUB and install them if available (SoundScapeHQ).
    1. Inspect the Mouse Feet:
    • Damaged or worn-out mouse feet can affect smooth movement. Replace them if necessary (Reddit).

    2.3 Addressing power and charging Issues

    If the mouse is not powering on or charging, try the following:

    1. Check the Battery Connection:
    • Open the mouse and ensure the internal battery cables are securely connected. Loose cables can prevent the mouse from powering on (Tom’s Hardware).
    1. Inspect the Charging Cable:
    • Use a different USB cable to rule out issues with the charging cable (SoundScapeHQ).
    1. Monitor Overheating:
    • If the mouse feels hot to the touch, disconnect it and allow it to cool down. Overheating may indicate a hardware defect that requires professional repair (Tom’s Hardware).
    1. Reset the Mouse:
    • Turn the mouse off and on again to reset its internal components. If the issue persists, contact Logitech support for assistance (SoundScapeHQ).

    2.4 Resolving button and scroll wheel Issues

    To fix button or scroll wheel malfunctions:

    1. Clean the Buttons and Scroll Wheel:
    • Dust or debris can accumulate under the buttons or scroll wheel. Use compressed air to clean these components (9meters).
    1. Reprogram Buttons:
    • Use Logitech G HUB to reprogram the buttons and ensure they are functioning correctly (SoundScapeHQ).
    1. Check for Physical Damage:
    • Inspect the buttons and scroll wheel for physical damage. If damaged, contact Logitech for repair or replacement (Tom’s Hardware).

    Preventive maintenance Tips

    To minimize future issues with the Logitech G PRO X SUPERLIGHT 2, consider the following tips:

    1. Keep the Mouse Clean:
    • Regularly clean the mouse, including the sensor, buttons, and scroll wheel, to prevent dust buildup.
    1. Use a Compatible Surface:
    • Always use the mouse on a high-quality mouse pad to ensure optimal tracking performance.
    1. Update Software and Firmware:
    • Regularly check for updates to Logitech G HUB and the mouse firmware to ensure compatibility and access to the latest features.
    1. Store the Mouse Properly:
    • When not in use, store the mouse in a safe, dry location to prevent physical damage.

    Conclusion

    The Logitech G PRO X SUPERLIGHT 2 is a highly capable gaming mouse, but users may encounter issues related to connectivity, tracking, power, and button functionality.

    By following the troubleshooting steps outlined in this report, most problems can be resolved effectively. For persistent issues, contacting Logitech support is recommended to explore repair or replacement options.

  • Detailed Guide on Subpixels in Gaming Monitors

    In the realm of gaming monitors, the pursuit of visual excellence is relentless.

    Manufacturers are continuously pushing the boundaries of display technology to offer gamers the ultimate viewing experience.

    One critical aspect of this pursuit is the subpixel arrangement in OLED monitors, which plays a vital role in defining the sharpness, clarity, and overall quality of the image.

    This guide delves into the various subpixel arrangements found in gaming monitors, their benefits, and the challenges they pose.

    Subpixel Arrangements and Their Significance

    Subpixels are the smallest physical points on a display and are typically composed of red, green, and blue elements.

    The arrangement and size of these subpixels can significantly impact the display’s resolution and color accuracy.

    For instance, the Alienware 32-inch 4K QD-OLED gaming monitor boasts a Quantum Dot OLED display with a high refresh rate of 240Hz, providing not only vibrant colors but also a smooth gaming experience (Laptop Mag).

    The PenTile Technology

    PenTile is a trademarked display technology by Samsung Display that utilizes a unique subpixel arrangement.

    Unlike the standard RGB layout where each pixel is comprised of red, green, and blue subpixels, PenTile displays may use a different combination, which can affect how certain content, especially text, is rendered (PC World).

    Scaling and Pixel Density

    The pixel density of a monitor, measured in pixels per inch (PPI), is a crucial factor in the sharpness of the display.

    Monitors with lower PPI can appear less sharp, but scaling can be applied to enhance text clarity at the expense of screen real estate.

    For example, 43-inch 4K monitors with approximately 103 PPI may use scaling to improve text readability (Display Ninja).

    Challenges with OLED Subpixel Layouts

    OLED technology is known for its vibrant colors and deep blacks, but the sub-pixel layout can sometimes result in issues with text clarity.

    The Asus ROG Swift OLED PG49WCD is a testament to the gaming prowess of OLED monitors but also highlights the potential hang-ups with text display due to sub-pixel layouts (PC Gamer).

    Brightness and Pixel Density in OLED Displays

    A recurring question in the OLED gaming community concerns the relationship between brightness, pixel density, and sub-pixel arrangements.

    iPhones, for example, have been able to achieve 2,000 nits of brightness at a high pixel density, while OLED TVs and monitors often struggle to reach 1,000 nits at lower pixel densities.

    This discrepancy raises questions about the inherent capabilities and limitations of OLED technology in different applications (Reddit).

    The Evolution of OLED Gaming Monitors

    The gaming monitor industry is witnessing the evolution of OLED technology.

    Asus claims to be at the forefront with its third-generation OLED panel, which suggests incremental improvements in display technology, including sub-pixel arrangements.

    These advancements are likely to enhance the gaming experience by providing better clarity and color accuracy (PC Gamer).

    High-Speed Performance in Newer Models

    The latest gaming monitors, such as the MSI MPG271QRX QD-OLED, are pushing the envelope with a 360Hz refresh rate and 1440p resolution on a 27-inch screen.

    This indicates a trend towards high-speed performance without compromising on resolution or screen size, which is a significant consideration for gamers looking for the best possible visual experience (GizmoChina).

    Conclusion

    In conclusion, subpixels play a fundamental role in the quality of gaming monitors.

    The industry is making strides with technologies like QD-OLED and high refresh rates, but challenges with sub-pixel layouts remain, particularly concerning text clarity.

    As technology advances, we anticipate improvements in brightness, clarity, and color accuracy, which will further enhance the gaming experience.

    It is evident that the evolution of OLED gaming monitors will continue to be driven by the demand for high performance and visual fidelity.

  • HyperX NGENUITY Optimization and Troubleshooting: A Comprehensive Guide

    HyperX NGENUITY software stands out as an essential tool for gamers looking to personalize and enhance their gaming peripherals.

    Its intuitive interface and robust customization options allow users to program macros, set button bindings, and adjust lighting to create a gaming experience tailored to their preferences.

    However, like any software, users may encounter issues that can impede their ability to fully utilize its capabilities.

    This guide delves into the optimization and troubleshooting of HyperX NGENUITY, drawing from various sources to provide a thorough analysis and practical solutions.

    Understanding HyperX NGENUITY

    HyperX NGENUITY is designed to offer gamers control over their HyperX peripherals, making it a critical component for a seamless gaming setup.

    The software’s key features include setting button bindings, programming and storing macros, and customizing lighting effects. It also offers a library of presets for quick configuration (Devicesmag).

    The software is used to manage Cloud III and other gaming gear from HyperX.

    Common Issues and Solutions

    One of the primary concerns with HyperX NGENUITY is hardware detection. Users may find that their devices are not recognized by the software, which can be due to hardware malfunctions such as faulty USB ports or cables.

    To resolve this, users should check the integrity of their connections and try different ports or cables to establish a stable link between the device and the computer (Devicesmag).

    Connectivity Problems

    Unstable connections can also lead to detection issues. Ensuring a secure connection between the mouse or keyboard and the computer is crucial for HyperX NGENUITY to function correctly.

    Users should verify that the connection is stable and try reconnecting the device if necessary.

    Software Updates

    Outdated software can cause compatibility issues. Users should ensure that their HyperX NGENUITY software is up to date by checking for the latest version on the Microsoft Store.

    Regular updates can fix bugs and improve the overall performance of the software (Digitalmasta).

    Interference from Other Software

    Peripheral device software from other manufacturers can interfere with HyperX NGENUITY.

    Users experiencing issues should consider disabling other peripheral software temporarily to determine if a conflict exists.

    If the issue is resolved, users may need to adjust settings or remove the conflicting software.

    System Reboot

    A simple yet effective solution for many software issues is to reboot the system. This action can clear any temporary glitches and allow the software to start fresh.

    Users should attempt this basic troubleshooting step before delving into more complex solutions (Digitalmasta).

    Seeking Further Assistance

    If the aforementioned solutions do not rectify the issues, users can seek assistance from HyperX’s customer support.

    The support team can provide expert troubleshooting and, if necessary, guide users through the process of opening a Return Merchandise Authorization (RMA) for defective products.

    HyperX offers technical care and customer care services, which can be accessed via their support page or by calling their customer service line at +1 (888) 484-9335 (HyperX).

    Conclusion

    Optimizing and troubleshooting HyperX NGENUITY software requires a methodical approach to identify and address issues.

    From hardware checks to software updates, each step plays a vital role in ensuring that users can fully enjoy the customization features of their HyperX peripherals.

    By staying vigilant and proactive in maintaining their software and seeking support, when necessary, gamers can minimize disruptions and enhance their gaming experience.

  • Razer Basilisk V3 Optimization and Troubleshooting Guide

    The Razer Basilisk V3 is a highly customizable gaming mouse featuring an ergonomic design and numerous features tailored for gamers.

    Despite its advanced capabilities, some users have reported issues ranging from connectivity problems to complete device failures.

    This guide aims to offer a comprehensive guide on optimizing and troubleshooting the Basilisk V3, drawing on available online resources and user experiences.

    Optimization of Razer Basilisk V3

    Optimizing the performance of the Basilisk V3 involves setting up the device correctly and taking advantage of its features through Razer Synapse, the official configuration software.

    To begin, users must install Razer Synapse and connect their mouse to the PC via USB (“How to program Razer Basilisk V3”).

    Upon opening Synapse, users can customize the mouse’s settings, including DPI sensitivity, lighting effects, and button assignments.

    The Razer Basilisk V3 offers full spectrum customizability with 10+1 programmable buttons and an intelligent Razer™ HyperScroll tilt wheel, along with Razer Chroma™ RGB for a personalized gaming experience.

    Users should configure these settings to match their specific gaming needs and preferences.

    Troubleshooting Common Issues

    Despite its features, the Razer Basilisk V3 has been subject to various complaints.

    Some users have experienced their mouse stopping working entirely, with no power received when plugged in.

    Others have reported intermittent disconnections, especially when lifting the mouse.

    Connectivity Issues

    Connectivity issues, including unstable connections and random disconnections, are common problems.

    To address these, users can try resetting the mouse, which can clear stored settings or software glitches that may cause such issues (“Must-Read: How Long Does It Take To Reset A Razer Basilisk V3?”).

    Additionally, checking for firmware updates and ensuring the USB port is functioning correctly may resolve these problems.

    Complete Device Failure

    In cases where the Basilisk V3 stops working entirely, a step-by-step troubleshooting approach is recommended.

    Users should check the mouse on another computer to rule out a system-specific issue.

    If the problem persists, contacting Razer support for a warranty claim or repair may be necessary, as the issue could be hardware related.

    Conclusion

    The Basilisk V3, while a feature-rich gaming mouse, is not immune to technical difficulties.

    Users are encouraged to utilize Razer Synapse for customization and to stay vigilant for any signs of connectivity or hardware issues.

    When problems arise, a systematic approach to troubleshooting should be employed, starting with simple fixes like resetting the device and progressing to more involved solutions such as warranty service if necessary.

    In light of the information provided, it is evident that while the Razer Basilisk V3 has impressive capabilities, there are notable concerns regarding its reliability.

    Users should weigh the benefits of the mouse’s features against the potential for technical issues when considering this device.

  • Logitech G502 Optimization and Troubleshooting Guide

    The Logitech G502 series has been a cornerstone of PC gaming peripherals, offering a range of mice that cater to the needs of gamers and professionals alike.

    The series includes the G502 Hero, the G502 LIGHTSPEED, and the latest iteration, the G502 X.

    Each version has brought incremental improvements, maintaining the series’ reputation for precision, customization, and durability.

    However, even the most reliable gaming mice can encounter issues such as stuttering or lagging.

    This guide aims to provide an in-depth analysis and troubleshooting guide for optimizing the performance of Logitech G502 gaming mice.

    Performance Issues and Fixes

    One common issue with the Logitech G502 Hero is stuttering or lagging, which can significantly hinder the user experience.

    According to a source from GetDroidTips, this problem may arise from an unstable connection, potentially due to a faulty USB transceiver (GetDroidTips).

    To address this, users should check the mouse’s connection by ensuring the USB ports on their system are functioning correctly.

    Fix 1: Check the Mouse Connection

    An unstable connection is often the culprit behind stuttering or lagging issues.

    Users should inspect their USB ports for any signs of damage or debris that could interfere with the connection.

    It is also advisable to test the mouse on different ports or even on another computer to rule out port-related issues.

    Fix 2: Update or Reinstall Mouse Drivers

    Another solution is to update or reinstall the mouse drivers. Outdated drivers can cause compatibility issues that may result in erratic mouse behavior.

    Users should visit the Logitech website to find the latest drivers for their specific mouse model and install them accordingly.

    In some cases, a complete reinstallation of the drivers may be necessary to resolve persistent issues.

    Fix 3: Adjust Pointer Settings

    Customizing pointer settings is crucial for achieving optimal performance.

    The G502 series supports customization in two modes: Automatic Game Detection mode and On-Board Memory mode (Logitech Support).

    Users should utilize the Logitech G HUB to fine-tune their DPI levels, polling rate, and other pointer settings to match their specific needs and preferences.

    Logitech G502 Series Reviews and Performance

    The Logitech G502 Hero has been praised for its premium feel and wired reliability, while the G502 LIGHTSPEED offers a wireless option with low click latency and multiple connectivity options, including Bluetooth support (RTINGS).

    The G502 X, as the latest version, boasts upgraded switches for improved performance.

    These reviews underscore the importance of maintaining the mouse’s firmware and software to ensure users can leverage these advanced features.

    Logitech G502 LIGHTSPEED Setup

    For the G502 LIGHTSPEED model, proper setup is essential for optimal wireless performance.

    Logitech provides clear setup instructions that include turning the mouse on, downloading the Logitech G HUB software, and ensuring a clear wireless range of up to 10 meters (Logitech Support).

    Users should follow these instructions meticulously to prevent wireless interference and connectivity issues.

    Conclusion

    The Logitech G502 series remains a top choice for gaming enthusiasts and professionals seeking a high-performance mouse.

    While issues like stuttering or lagging can occur, they can often be resolved through simple troubleshooting steps such as checking connections, updating drivers, and customizing pointer settings.

    Reviews of the G502 series highlight the importance of these measures, as well as proper setup, to take full advantage of the mouse’s capabilities.

    By following the guidelines provided, users can ensure their Logitech G502 mouse performs at its best, providing a seamless and responsive experience.

  • Logitech G Pro X TKL Master Optimization and Troubleshooting Guide

    The Logitech G Pro X TKL represents a significant stride in the gaming keyboard market, tailored for competitive gamers who demand speed, reliability, and customization.

    With its tenkeyless design, the G Pro X has been lauded for its space-saving build and high-quality construction, making it a staple in the gaming community.

    This guide will delve into optimization strategies and troubleshooting tips for the Logitech G Pro X TKL, drawing upon reviews and insights from various tech experts.

    Optimization Strategies

    Key Customization and Switch Replacement

    One of the most notable features of the Logitech G Pro X is its hot-swappable switches, which allow users to customize their keyboard to their preferred typing experience or gaming needs.

    Users can replace the switches without opening the keyboard, which makes customization straightforward and user-friendly (PC World).

    This feature is a considerable advantage for gamers who wish to tailor their keyboard’s performance to specific games or typing habits.

    RGB Backlighting Customization

    The keyboard comes with full RGB backlighting, which can be customized individually for each key.

    This customization not only enhances the aesthetic appeal but can also serve a practical purpose by highlighting frequently used keys or creating profiles for different games (Rtings).

    Software Optimization

    Utilizing Logitech’s G HUB software, users can create macros, customize key functions, and set up game-specific profiles.

    This software is a powerful tool for optimizing the G Pro X keyboard, allowing users to tailor their keyboard to their gaming style and preferences.

    Troubleshooting Tips

    Key Chatter or Double Typing

    If users experience key chatter or double typing, a common solution is to check for firmware updates through the Logitech G HUB software.

    It’s also advisable to inspect the switches for any physical damage or debris that might be causing the issue.

    If a particular switch is faulty, the hot-swappable feature allows for a straightforward replacement.

    Connectivity Issues

    For users experiencing connectivity problems with their G Pro X keyboard, the first step should be to check the USB cable and the port.

    A damaged cable or a faulty port can lead to intermittent or failed connections.

    If the issue persists, resetting the keyboard by holding down the ESC key while plugging it in can sometimes resolve the problem.

    Occasionally, the Logitech G HUB software may encounter glitches or fail to recognize the keyboard. Reinstalling the software or updating to the latest version can often resolve these issues.

    Users should also ensure that their operating system is up to date to maintain compatibility with the keyboard and its software.

    Logitech G Pro X TKL Conclusion

    The Logitech G Pro X TKL is a robust and customizable tool for gamers and typists alike.

    Its hot-swappable switches and customizable RGB backlighting set it apart from competitors, providing users with a personalized and responsive gaming experience.

    For optimization, users should utilize the G HUB software to its full potential, creating profiles and macros that enhance their gaming performance.

    When troubleshooting, simple steps like checking for firmware updates, inspecting hardware, and ensuring software compatibility are often effective in resolving common issues.

    The G Pro X may be considered expensive by some, but its impressive array of features and customization options justify the investment for serious gamers and professionals (TweakTown).

    By following the optimization strategies and troubleshooting tips outlined in this report, users can maximize the performance and longevity of their Logitech G Pro X TKL Keyboard.

  • ZOWIE XL2566K Optimization and Troubleshooting Guide

    The ZOWIE XL2566K monitor is a high-performance gaming monitor designed for esports enthusiasts and professional gamers.

    Its features cater to the demands of high frame rates and fluid motion handling, which are crucial for competitive gaming.

    This guide provides a detailed analysis of optimizing and troubleshooting the ZOWIE XL2566K, drawing on available reviews, specifications, and support information.

    Optimization for Peak Performance

    Optimizing the ZOWIE XL2566K involves setting up the monitor to harness its full potential, particularly its 360Hz refresh rate capability with DyAc⁺™ technology.

    To achieve this, users must ensure that their system meets the necessary requirements, including a graphics card with a DisplayPort 1.4 output to support the high refresh rate (ZOWIE Knowledge). Moreover, the monitor should be connected to the PC using the DP 1.4 cable included in the box.

    Once the hardware setup is complete, users should install the latest monitor driver from the official ZOWIE website to ensure compatibility and access to all features (ZOWIE Support).

    Additionally, configuring the monitor settings to match the user’s preferences and the game’s requirements can enhance the gaming experience. This includes adjusting brightness, contrast, and the Black eQualizer feature for better visibility in dark scenes.

    The XL2566K’s TN panel, while not delivering the best overall picture quality compared to IPS or VA panels, is a deliberate choice to prioritize response times and minimize motion blur, a critical factor in fast-paced games.

    Users should bear in mind that this trade-off means that while the monitor excels in motion handling, it may not provide the most vibrant colors or widest viewing angles (Rtings Review).

    Troubleshooting Common Issues

    Display Issues

    Users experiencing display problems, such as flickering or incorrect resolutions, should verify that the monitor is set to its native resolution of 1920 x 1080 pixels and the highest refresh rate supported by their graphics card.

    If issues persist, it may be necessary to reinstall the monitor driver or reset the monitor to factory settings.

    Connectivity Problems

    If the monitor is not detected by the PC, checking the integrity of the DP 1.4 cable, and ensuring that it is properly connected is essential. Users should also confirm that their graphics card’s firmware is up to date and compatible with the monitor’s high refresh rate.

    Variable Refresh Rate (VRR) Concerns

    To utilize Variable Refresh Rate technologies such as Adaptive-Sync, FreeSync Premium, or G-Sync Compatible, users must activate the feature within the monitor’s menu and ensure that their graphics card supports the technology (ZOWIE FAQ).

    Ergonomic Adjustments

    For those experiencing discomfort, such as headaches or eye soreness, adjusting the monitor’s ergonomics, including height, tilt, and swivel, can alleviate these symptoms.

    The XL2566K is noted for its excellent ergonomics, allowing for quick and easy adjustments to achieve an ideal viewing position (Rtings Review).

    Conclusion

    The ZOWIE XL2566K is a specialized gaming monitor that excels in providing a high refresh rate and excellent motion handling, making it a top choice for esports gamers.

    While it may be considered expensive for a 1080p monitor, its design and features are tailored to meet the specific needs of its target audience.

    To optimize the ZOWIE XL2566K, users must ensure proper hardware setup, driver installation, and settings configuration.

    Troubleshooting should focus on display, connectivity, VRR, and ergonomic comfort. By following these guidelines, users can maximize the performance and enjoyment of their ZOWIE XL2566K monitor.

  • HyperX Cloud III Master Optimization and Troubleshooting Guide

    The HyperX Cloud III has emerged as a notable successor to the Cloud II, a headset that garnered a significant following among gamers for its performance and comfort.

    Given the advancements in gaming technology and user expectations, the Cloud III had big shoes to fill.

    This guide delves into the optimization and troubleshooting of the HyperX Cloud III, drawing on recent reviews and user experiences to present a comprehensive guide.

    Overview of HyperX Cloud III

    The HyperX Cloud III wireless headset has been praised for its sturdy design and comfort, making it a versatile choice for gamers across various platforms (Game Rant).

    It has been designed with a similar sound profile to its predecessor but with notable improvements in comfort and aesthetics (Tom’s Hardware).

    The wired version of the headset stands out for delivering high-quality audio and features DTS Headphone:X compatibility for 3D spatial audio, enhancing the gaming experience (How-To Geek).

    Performance Optimization

    To fully optimize the HyperX Cloud III for gaming, users should ensure they are using the latest firmware, which can be downloaded from the HyperX official website.

    This ensures any known issues are addressed, and new features are enabled. Users should also take advantage of the DTS Headphone:X feature for an immersive audio experience, especially in games that support 3D spatial audio.

    The Cloud III’s redesigned drivers aim to deliver accurate, smooth, and detailed sound. Gamers should customize their audio settings in-game to take advantage of this precision, adjusting equalizer settings to match their preferences or the demands of specific games.

    For instance, increasing the bass can enhance the experience in action-heavy games, while a more balanced profile might be better for strategy games where clarity across frequencies is key.

    Troubleshooting Common Issues

    Audio Quality Concerns

    Some users might find that the audio quality does not meet their expectations. In such cases, it is recommended to check the audio settings on the gaming platform and ensure that the headset is set as the default audio device.

    Adjusting the equalizer settings can also help tailor the sound to individual preferences. If the issue persists, it may be necessary to update the headset’s drivers or reset the device to its factory settings.

    Connectivity Problems

    The HyperX Cloud III Wireless is designed for low-latency gaming, but some users may experience connectivity issues.

    To address this, users should ensure that the headset is within the recommended range of the wireless transmitter and that there are no significant obstructions or sources of interference nearby.

    If problems persist, resetting the wireless connection or reconnecting the device can often resolve these issues.

    Microphone Quality

    The headset’s less-aggressive uni-directional noise reduction is designed to cut down on background noise without compromising audio clarity.

    If teammates are having trouble hearing clearly, it may be necessary to adjust the microphone settings on the gaming platform or within the headset’s software.

    Ensuring the microphone is positioned correctly can also make a significant difference.

    Comfort Concerns

    Although the Cloud III is acclaimed for its comfort, some users may still encounter discomfort during extended use.

    It is important to adjust the headband and ear cups to fit securely without being too tight. Taking regular breaks can also help prevent discomfort and fatigue.

    To factory reset your HyperX Cloud III Wireless headset, follow these steps:

    Locate the Buttons:

    The power button and volume up button are essential for the reset process.
    These buttons should be on the headset itself, not the microphone.

    Press and Hold

    Simultaneously press and hold the power button and volume up button for seven seconds.
    Make sure both buttons are on the front side of the left headphone.
    Do not confuse the volume up button on the in-line microphone controller (attached to an optional headphone wire).

    LED Indicator

    If done correctly, the LED status indicator light will:
    Flash blue five times in a row.
    Then turn red for one second.
    Finally, the headset will turn off.

    Conclusion

    The HyperX Cloud III is a worthy successor to the Cloud II, offering improvements in comfort and sound quality.

    It competes well in its price range, despite facing competition from other HyperX models and a crowded market (PC Gamer).

    By following the optimization and troubleshooting advice outlined in this guide, users can enhance their gaming experience and address common issues effectively.

  • Wooting 60 HE Optimization and Troubleshooting Guide

    The Wooting 60 HE keyboard has garnered attention in the gaming community for its compact design, customization capabilities, and innovative analog input technology.

    This report delves into optimizing and troubleshooting the Wooting 60 HE, drawing on various sources to provide a comprehensive guide for users seeking to enhance their experience or resolve issues with this device.

    Optimization Strategies for the Wooting 60 HE

    Optimizing the 60 HE involves leveraging its software features and advanced settings to tailor the keyboard to individual preferences and needs.

    The HE offers a range of customization options, particularly through its companion software known as Wootility.

    This software allows users to fine-tune functions, including the rapid trigger functionality that sets the Wooting 60 HE apart in the gaming keyboard market (Xbitlabs).

    Wooting 60 HE Gaming

    To optimize the Wooting 60 HE for gaming, users should focus on adjusting the actuation point of the keys, which can be done through the Wootility.

    This feature enables gamers to set the point at which keypresses are registered, allowing for faster response times and more precise control.

    Moreover, the Wooting 60 HE’s analog input capability can be harnessed to provide nuanced control in games, such as variable movement speed depending on how far a key is pressed.

    Lighting customization is another aspect of optimization. Although the Wooting 60 HE scored a 6.0 in lighting customization according to TechGearLab, users can still personalize the RGB lighting to their liking, creating profiles for different games or environments (TechGearLab).

    Troubleshooting Common Issues

    Despite its advanced features, users may encounter issues with the Wooting 60 HE. Common problems include firmware update errors and hardware compatibility.

    For instance, early batch 60HE ARM users on Windows might need to apply a registry fix provided by Wooting to address update or restore errors (Wooting Help Scout).

    If a user needs to restore their keyboard to factory settings, the Wooting support outlines a specific key combination to enter keyboard restore mode, which varies depending on the keyboard layout.

    For the 60% layout of the Wooting 60 HE, the combination is the [Backspace] and [Fn] keys (Wooting Help Scout).

    User-Friendliness and Convenience

    The ease of programming and macros, along with the convenience of the keyboard, contribute to the user experience.

    The Wooting 60 HE scored a 7.0 and 6.4 respectively in these categories, highlighting that while the keyboard has strong points in performance, there is room for improvement in user-friendliness (TechGearLab).

    Users can enhance convenience by setting up dedicated arrow keys using the mod tap feature, as detailed in the Wooting 60 HE Quickstart guide (Wooting).

    Conclusion

    In conclusion, the Wooting 60 HE is a powerful tool for gamers, offering unparalleled customization and performance.

    However, to fully harness its capabilities, users must engage with its software features and be proactive in troubleshooting.

    While the keyboard does have some areas that could be improved for ease of use, its strengths in performance and customization are evident.

    The Wooting 60 HE stands as a testament to the potential of gaming keyboards to enhance gameplay through technological innovation.

  • SteelSeries Arctis Nova Pro Master Optimization & Troubleshooting Guide

    The SteelSeries Arctis Nova Pro headset has been recognized as a significant player in the gaming headset market since its release.

    Designed with the gamer in mind, it provides a binaural audio experience, tailored for intense gaming sessions and immersive audio environments.

    With features such as a rotary dial for volume control and additional buttons for user convenience, the Arctis Nova Pro has set a standard for gaming headsets.

    This guide delves into optimizing the user experience of the Arctis Nova Pro and provides troubleshooting advice to ensure peak performance and longevity of the device.

    Optimization Strategies

    Audio Customization

    The Arctis Nova Pro is equipped with the GameDAC Gen 2, a digital-to-analog converter that allows users to access various inputs and customization features, including an equalizer (EQ) and channel mixing (Rtings.com).

    To optimize audio performance, users should:

    • Utilize the GameDAC to adjust EQ settings according to the type of game or media being consumed. For instance, increasing bass can enhance the impact of sound effects in action games.
    • Experiment with channel mixing to find the perfect balance between game audio and voice chat, ensuring clear communication with teammates.

    Comfort and Durability

    Weighing in at 295 grams, the Arctis Nova Pro is built with lightweight and durable materials, providing comfort for extended gaming sessions (Guru3D.com). To maintain comfort:

    • Adjust the headband to distribute weight evenly across the head, reducing pressure points.
    • Choose the right ear cushions from the options provided by the manufacturer to suit personal preference and enhance the headset’s noise isolation capabilities.

    Connectivity and Mobility

    The Arctis Nova Pro features a detachable cable with a length of 1.2 meters, offering flexibility and easy storage. To optimize connectivity:

    • Ensure the cable is securely connected to both the headset and the audio source to prevent any interruptions.
    • When mobility is required, consider using the wireless counterpart, the SteelSeries Arctis Nova Pro Wireless, for a tether-free experience (Rtings.com).

    Troubleshooting Common Issues

    Audio Quality Concerns

    If users experience diminished audio quality, the following steps should be taken:

    • Check the GameDAC settings to ensure the EQ is configured correctly for the content being played.
    • Inspect the cable for any signs of damage or wear. Replace if necessary.
    • Verify that the headset is set as the default audio device in the computer’s sound settings.

    Connectivity Problems

    For issues related to connectivity:

    • Reconnect the detachable cable, ensuring a firm connection at both ends.
    • Test the headset with another device to rule out problems with the original audio source.
    • Update the device’s drivers, including the Intel Wireless drivers package, to ensure compatibility and optimal performance (Guru3D.com).

    Comfort and Wear

    If the headset becomes uncomfortable over time:

    • Adjust the headband to alleviate any pressure points.
    • Replace ear cushions if they become worn out to maintain comfort and audio quality.

    Arctis Nova Pro Conclusion

    The SteelSeries Arctis Nova Pro headset is a versatile and high-quality choice for gamers seeking an immersive audio experience.

    By following the optimization strategies and troubleshooting tips outlined in this guide, users can enhance their audio experience, maintain comfort, and ensure the longevity of their headset.

    With careful attention to customization, connectivity, and maintenance, the Arctis Nova Pro can provide an exceptional gaming experience.